Saturday, September 30, 2017

Tool Score - Gerstner Tool Box

Someone had listed a Gerstner and Sons tool box on a local classifieds website, complete with a few tools.  It turns out that it was a model 42, in Oak. They listed it for $450, but I couldn't afford that.  I offered $250, and we settled on $300.  It was nearly theft on my part - the box alone goes for $350.  I also picked up another set of inside micrometers (Millers Falls Company), outside micrometer (Starret, No. 224 0-4"), and a 5" Brown and Sharpe sine bar :


So, on to the tool box.  It has definitely seen better days.  I don't really want to refinish it, though.  It is beautiful.


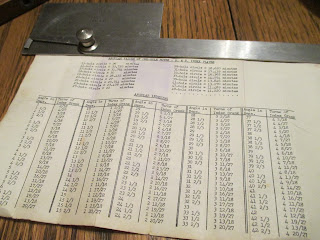
My biggest surprise was middle drawer that enclosed a 1940 10th edition of the Machinery Handbook (the bible for a machinist), with a hand written note that it was purchased in 1940.  If it was purchased for this tool box, that puts the tool box into the same era.


Next, I did a little drawer organization.  Starting from the bottom, I found end mills, cutting inserts, lathe bits, set screws, ball bearings, hex wrenches and boring bars.  I also found a weird little measuring device that I am unfamiliar with :


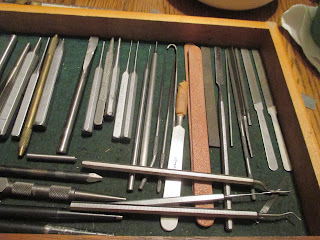
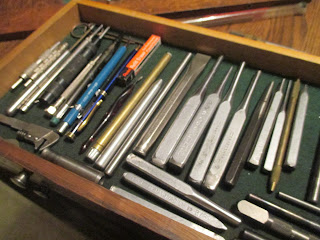
Next one up had punches, chisels, files, pencils/pen, and a the usual marking supplies along with a demurring tool set :


The third drawer from the bottom had a few clamps, a 0-1" outside micrometer (Geo Scherr Company), a 1-2" outside micrometer, dividers, compass, a few needle points that I am unfamiliar with, and an old pin chuck :


Next, we'll tackle the left drawers.  The bottom of the left side drawers contained some machinist jacks, v-blocks, clamps, and a little machinist vice.  One cool thing out of that drawer was a portable oiler, shown in the middle of this next picture :


Next was a bunch of taps (some custom ground for specific purposes) :


And then, in the top-most drawer on the left side, tap wrenches and a few dies (along with a random chuck key).  The cool thing was this tool box owner built his own die using a nut and either a mill or a drill :


Next, I went to the right side, starting from the bottom-misty right-handed drawer.  It was full of center drills, drill bits for a chuck, and drill bits for a morse taper (1MT).  It was just getting better all the time.

Next came with some solder, stones, o-rings, and some other odds and ends.  I am interested to know who "Carla" was - written on one of the measuring rulers found here :


Two left!  Next one on the right side was full of gear pitch gauges, feeler gauges, and other measuring tools.  This owner was definitely organized :


One thing in this drawer I was unfamiliar with was a craftsman tool looking like :


So, onward and upward.  The last drawer was filled with bushings, pins, welding tips, a couple of springs, and some rather weird stuff.  It also had two pieces of what looked like part of a sine bar, and four small parallels :


Finally, to the top.  This was a bit of a score in and of itself.  There were two squares, three micrometer stands, a small micrometer, a small mechanical micrometer, angle finders, an alignment device (Tubalcain/mrpete222 called it a "wobbler", and I am not sure of the official name), parallels/gauge blocks, and some right-angle blocks :


Yes, I think I scored.  For a grand total of $350, I ended up with four micrometers, three micrometer stands, rulers, alignment pins, drill bits, v-blocks, jacks, taps, dies, end mills, lathe cutting bits, inserts, set screws, dividers, and a host of other things I've already forgotten.

Saturday, September 9, 2017

Generating Video Intros for Training Segments

Our company had some training.  We are large enough that we have dedicated videographers and video editors, but they were unavailable.  After recording the webex, we needed to break the videos into segments, and throw a header on each segment.  That meant I had to generate some fancy-schmancy header that included a company logo, followed by the vendor logo, and then enough time to put segment-specific text.  Here's how I built the header :

First, I generated four separate images I wanted to use.  The first was "white".  The second was the company logo on white.  The third was the vendor logo and faded-company logo on white, and the last was both vendor and company logos faded on a white background.  I called them "frame-01.jpg", "frame-02.jpg", "frame-03.jpg", and "frame-04.jpeg".  I know, I know, fairly creative naming convention.

Next, I needed to create video segments for each of those.  Seeing as how I love the open-source world, and I prefer Linux as my workstation, I ended up using a command line :
    ffmpeg -loop 1 -i frame-01.jpg -c:v libx264 -t 2 -r 30 -pix_fmt yuv420p -vf scale=1920:1080,setdar=16:9 01-white.mp4
    ffmpeg -loop 1 -i frame-02.jpg -c:v libx264 -t 7 -r 30 -pix_fmt yuv420p -vf scale=1920:1080,setdar=16:9 02-company.mp4
    ffmpeg -loop 1 -i frame-03.jpg -c:v libx264 -t 7 -r 30 -pix_fmt yuv420p -vf scale=1920:1080,setdar=16:9 03-vendor.mp4
    ffmpeg -loop 1 -i frame-04.jpg -c:v libx264 -t 2 -r 30 -pix_fmt yuv420p -vf scale=1920:1080,setdar=16:9 04-faded-2_seconds.mp4
    
That gave me four separate videos. I wanted it to be fancy, so I thought I would use a fancy video editor to generate some cross fade/transition segments between each of them.  I used Cinelerra. It is fairly complex, but you can do a TON of stuff with it. I could have done the entire video - but kept ending up at the command line because that's where I felt most comfortable with it.  Anyway, I used that to generate transitions between the white and company videos, the company and vendor videos, and the vendor to faded videos.  I also generated a fade from the faded to the white video, just so I could fade it back to white.

Once I had those videos and transition videos, I could finally assemble them into a single header video.  This was done by creating a file with the file names listed in the following format :
    file '015-transition_from_white_to_intermountain.mp4'
    file '025-transition_from_ihc_to_sav.mp4'
    file '035-transition_from_sav_to_faded.mp4'
    file '04-faded-2_seconds.mp4'
    file '04-faded-2_seconds.mp4'
    file '04-faded-2_seconds.mp4'
    file '045-transition_from_faded_to_white.mp4'
    
After that, it was simply running the following command to assemble them into a single video file :
    ffmpeg -f concat -i files.txt -c copy saviynt-training_header.mp4
    
There was a small problem - my monitor resolution was a wee bit smaller than the 1920x1080 video I had generated.  So, on a whim, I down-scaled that video into something smaller I could play as a preview :
    ffmpeg -i saviynt-training_header.mp4 -vf scale=720:480,setdar=16:9 saviynt-training_header-smaller.mp4
    
Not a bad days' work!