I was handed an old, cardboard tube that was falling apart by some family members. Opening it up revealed my next project. Now, when I say "project", I mean my next "learning curve". I've never actually finished a fly fishing rod, nor have I ever even attempted to "restore" one. I immediately bought a new tube to protect the rod. It was a family members rod from decades ago, and it was fatigued in one area, and some of the guides were missing or gone completely.
So, as I embark on a new thing to learn, don't yell at me for doing something wrong, and don't cuss me out when I don't do it "your way". This is new territory for me.
Anyway, my first task was "inventory". With a little machinist craftsmanship beneath my belt, this "inventory" is more than counting the four pieces in this 3-piece rod (yes, you read that right - it's a 3 piece rod with four pieces - one is a second tip). I'm going to identify where everything is on this rod - where the guides are, tips, lengths, etc. First, I started with the base. I know the reel seat/grip will need to be replaced, and because of that the length could change - but it does not matter. Using these numbers, I can recalculate from the other end - so either way, I'm starting off in good shape by knowing where everything is. The base looks to be 36" long, with the grip/seat making up 10" of that. There is a wrapping at about 20.25" from the butt end of the rod (possible place for a hook keeper?), and a guide at the 30" mark that is missing (6" from the ferrule end of the butt piece) :


The middle section of rod (the one with the missing eyelet) is 35.5" long, with a guide (fell off) at the 4.25" mark from the butt end of this middle section. Another guides sit at the 13 3/8" mark, the 22.25" mark, and the 30.75" mark on this rod section.
And each tip looks to be about 36.75" long (one is 37" with a different tip - it's not a spare tip). There are four guides. From the butt end of the tip sections (both line up exactly except for the longer tip), the guides are at 4 7/8", at 13 1/16", at 21 3/32", and 29 1/8" - then you get the tips.
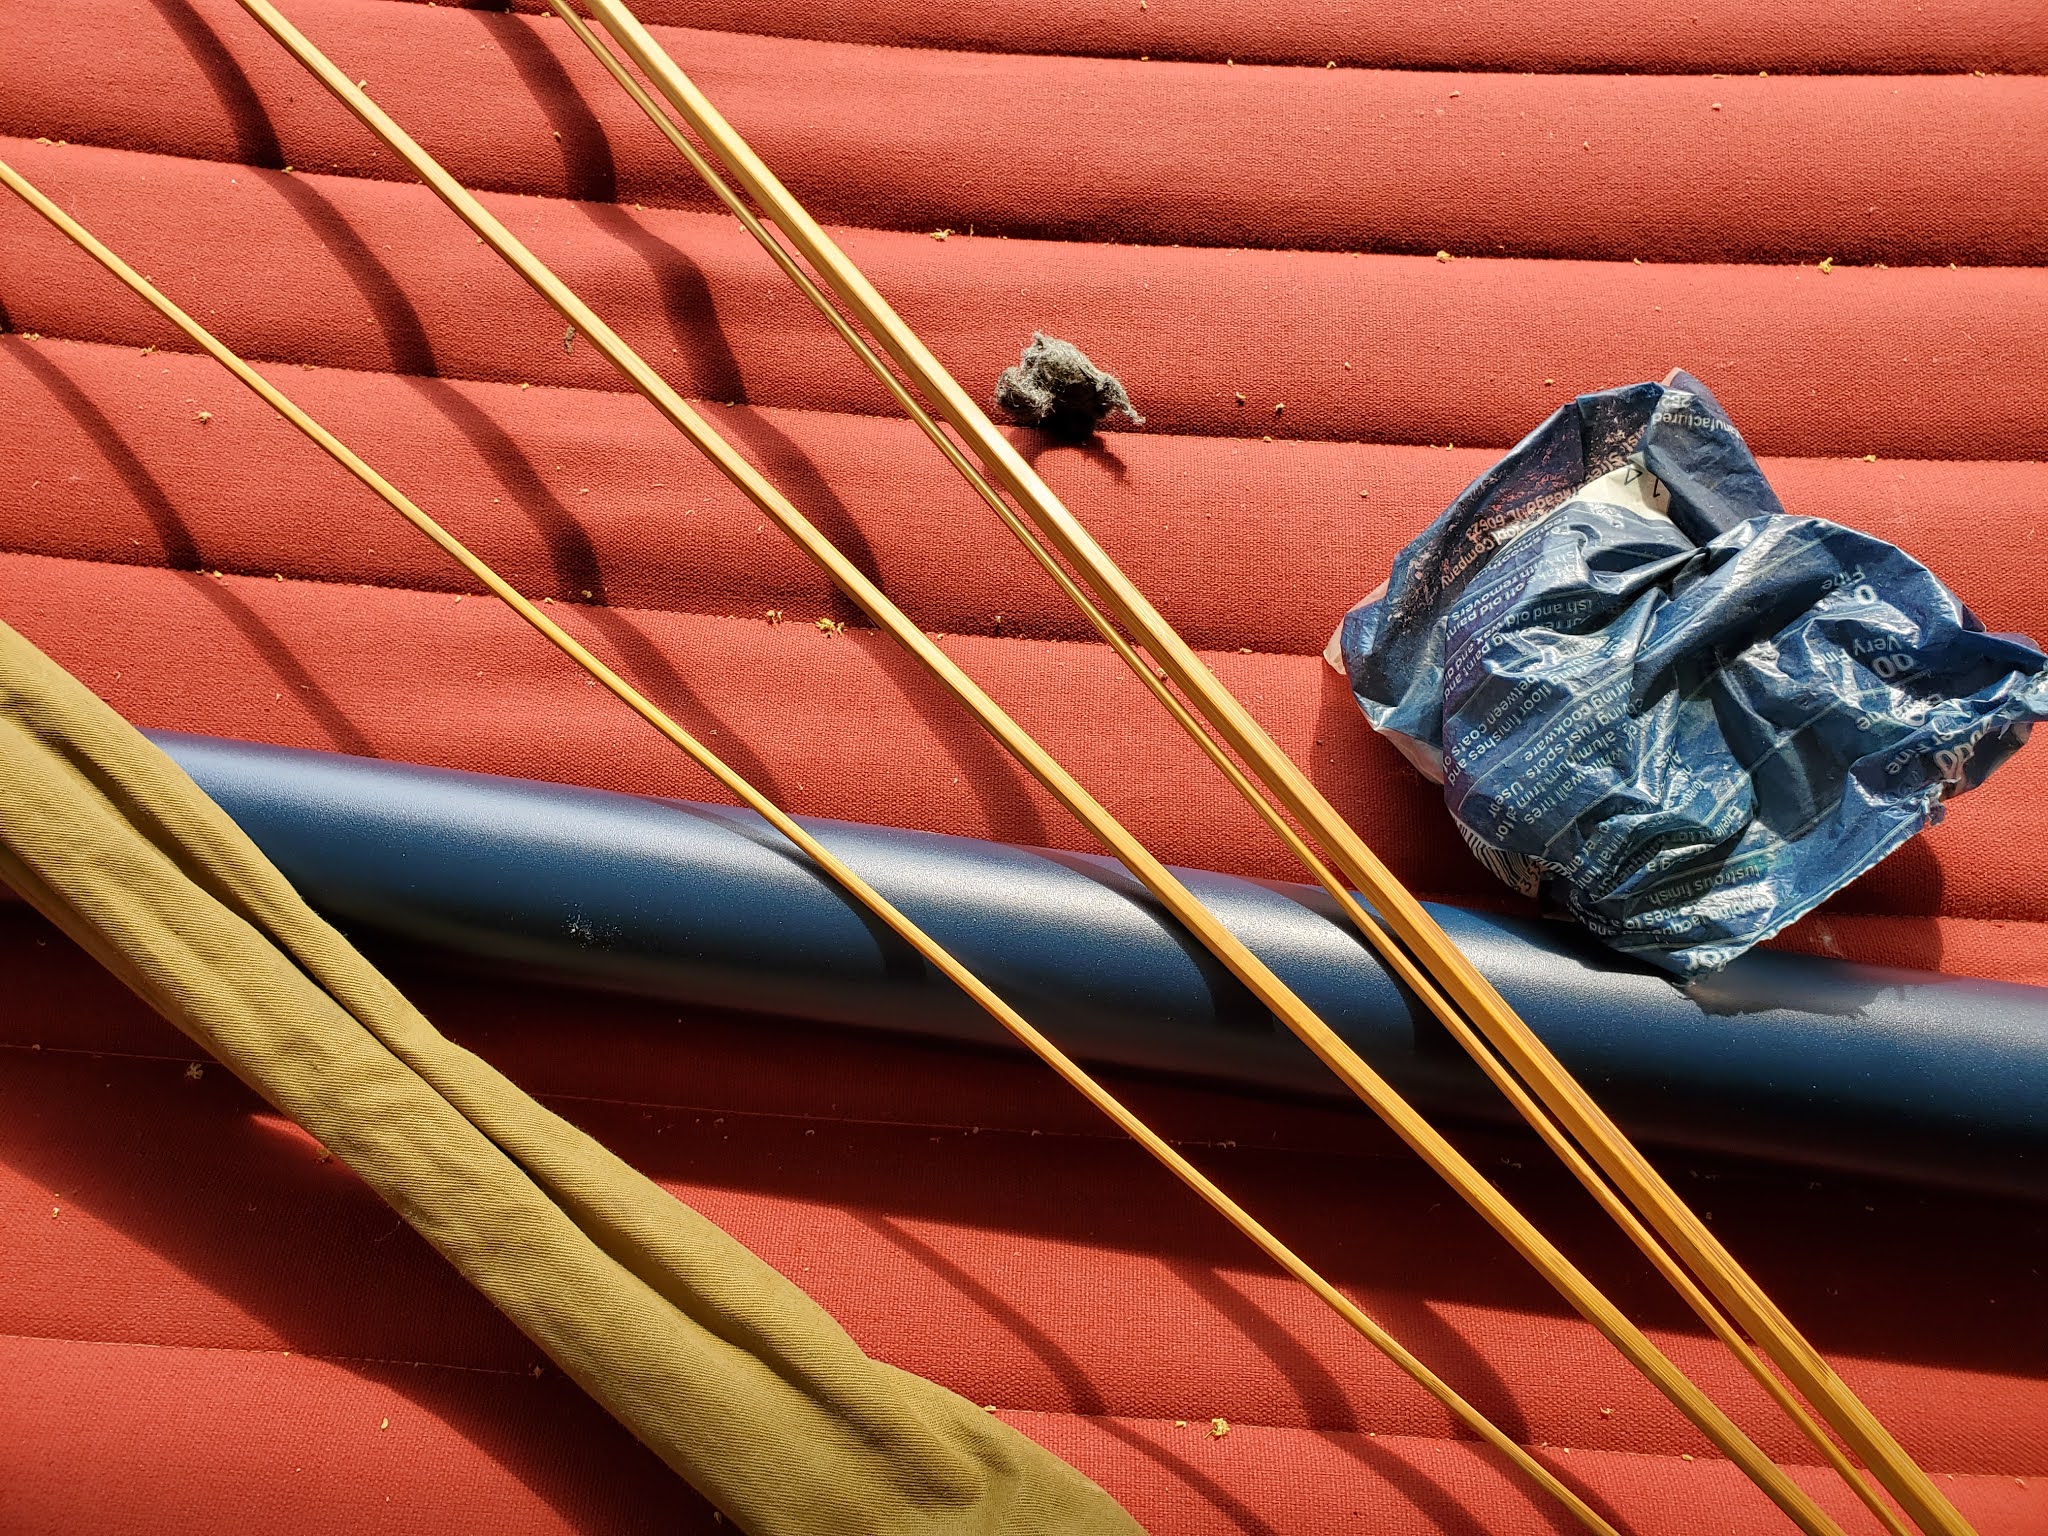
With that in hand, it was time to strip it down. First is to remove the eyelets. I'm using an exact-style knife to cut through the thread wrapping, taking note to NOT cut into the bamboo (why weaken the rod?).
Once I got going here, I found it easier to use a pair of tweezers to get the thread next to the guide, and then just unravel it beneath the varnish. I'd pop that guide out (and into a jar for safe-keeping), and then unravel the other side.
With those done, I needed to start removing the ferrules. One ferrule was cracked - which probably means new ferrules, too. The ferrules - well, some of them were loose and slid off (okay, only one did that), and the others were on tighter than ... I'd better filter that thought.
I tackled the ferrules the same way a machinist would tackle a stuck bearing - with heat. I started out thinking I'd be REALLY smart, with the heat gun and a glass of cold water for expansion/contraction to loosen it up. I found that I didn't need the water at all except to drink and cool off. I started on the tip on one of the tip rods, and the tip just fell off when it got hot enough - there was a rosin used to hold it together. I believe it was rosin because it smelled exactly like the stuff I used to put on my bow when I played the cello. Anyway, knowing it could just pop off, I hit each ferrule and tip with heat until I could grab it with a gloved hand and just pull it off.
Next thing to tackle was the reel seat/grip. I hit it with some heat, thinking it would be the same as the ferrules.... but no. I then grabbed a knife and whittled into the cork grip, and found that the cork was tacked to the bamboo with a thin layer or rosin. There were no pieces underneath. The cork-to-rod ferrule just popped with a little heat, and was off, then I could use a cabinet scraper to get the rest of the cork off. At that point, I realized someone had put wood underneath the reel seat. I've left that for now - I will likely tackle that when I am putting a new grip/seat on. I will likely simply clean the reel seat wood off. It was interesting to see how the grip was made - this wasn't a solid piece of cork. It was rings that were glued together and then turned on a lathe (which would have been normal back then). You can see the glue lines in the following.


After that is using the cabinet scrapers to scrape the varnish off. This is yet another part where you have to be careful - you don't want to scrape the bamboo off, only the varnish. There are 6 pieces of bamboo in each section, forming an octagonal shape on a cross section. I scraped each of those surfaces separately, and it was a hot process (it's 94.51 degrees outside right now, and 100.8 in the garage where I was working).
After scraping, I took some 4-ought steel wool (0.004" if you'd rather). This allowed me to attack the corners of each piece of bamboo (the apexes of the hexagonal structure) without damaging the integrity of the rod.
With the last of the varnish removed, I then set about removing the set. When you see a rod at rest (nothing on it) and it is arcing naturally, that is a form that has set. We want this to be as straight as possible. I started out identifying the curve using the rod against a straight edge to see when it starts to curve away from the edge. This would let me identify how long the form set was in the rod.
I broke out the head gun, and (without gloves, if it's too hot to touch, I didn't want to go any hotter) started heating up the sections. When it was hot enough, I'd simply stress, or bend, the rod in the opposite direction of the natural curve, and hold it there until it cooled. I'd check it again, and repeat until it was close.
It was around this time I completely stopped checking it against the straight edge. It was just easier to sight along the rod and identify any curves. Then I could work on that section until it was straight... ish. Wash, rinse, and repeat. After a while, when I was close, I'd put the final touches on it and then taped it against the top of a door frame in the basement to really cool down.
So now, I have a great blank, ready to be put back together. Knowing I had a cracked ferrule and a missing guide, I need a full set of each. I tracked down and ordered the guides, but they only had one set in stock - I may need to get another set for the other rod tip. We'll see, maybe I can re-use the originals.
I tracked down some ferrules, but this is where I got lost for a while. I found that you measure the inside diameter of the female. If you can, measure the rod side, not the mate side (where it goes to the rod). This is not possible with ferrules still on the rod. I'd taken mine off, and using a set of pin gauges, I grabbed a few measurements. I don't know if I ordered too big - we'll see.
I ordered a "lemon metallic" wrapping thread (because it is closer to the original color, as far as a monitor and someone else's camera will go - we'll see when it gets here). I also ordered a "black metallic" thread for the trim. Unfortunately, I think this might be closer to the gun metal finish than it will to the black guides. We'll see how well this all rolls together. I went with metallic thread because it doesn't need color preserver (yeah, I've read a bit around the ol' Internet). Also, a quick note, I ordered size "A". Size "A" is the finest thread. Size "B" is a little more coarse, and size "D" is for salt water, deep-sea kinds of rods and is the coarsest of the choices I found.
I also ordered a new reel seat and grip. I chose a gun metal finish to get closer to the black of the guides and the trim thread wrapping. As my wife wanted to go closer to original, this was the only deviation I've gone with. I do need to figure out how to make it a down-locking reel seat, instead of the standard up-locking.
First, I needed to get the reel seat set up. To do that, I had to use the lathe to turn down the existing wood core to an appropriate dimension. This is where a spindle through-hole is nice. The bamboo went through the spindle so I had a stable handle.
With that the right dimension (I also had to turn a piece of the wood core down tip-side so that I could get the handle up against the reel seat), I could re-mark the spline, prepare for the glue up, and then epoxy it into place.
With me putting the reel seat in backwards, I needed to make a small bushing to hold the back of the handle and close holes up.
Then, the glue up of the bushing to the rod.
Finally, the handle :
Finally, I can start thread wrapping! Again, the "lemon metallic", surrounded by the metallic black threads. Wrap each one, epoxy them to seal them up and prevent them from unwrapping, and also ending off the ferrules.
Followed by the a coating of Val-spar varnish :
After a good curing time, the rod is finished!
I gave it some test casts to see how it felt - it is better than before. Note that my cast is so terrible, that any amount of improvement is good. It feels balanced, it bends right, and it seems to be fairly solid. I'll call that a success!