Finally, after all that effort (both the kind that had results and the kind that didn't result in anything that was really needed), I have the place installed on the car!

Now I can legally drive!


Finally, after all that effort (both the kind that had results and the kind that didn't result in anything that was really needed), I have the place installed on the car!
Now I can legally drive!
I started digging around getting the license plate light installed, and in the assembly manual, there is this little gem :

It doesn't say much about how it got into position, and my memory is fading, so I cannot answer how this little bracket is installed. With having to create the mounting bracket underneath, I'm starting to think I now have to custom build a bracket to fit this aftermarket bumper cover. Okay, I'm going to treat this like we did the gasket, and create a paper template, print to make sure it fits, then print and glue to some angle iron that I can use to mount this thing up. I'm hoping I don't have to remake the bracket, but we'll see.
First, it's time to grab a photo and take some dimensions.

With this, I fed this first into GIMP (the open source photo editing software), and "unskewed" it (rotating and altering how the image sites to simulate a perpendicular photo - symmetry is key). Next, I open up Inkscape (open source Scalable Vector Graphics editor), and proceed to trace the image.

Once mapped out, it's time to make sure we got the size right.Select everything, and then make sure, using the measuring tool.

With accurate measurements, it's time to perform the object math - subtracting the pieces to get exactly what we want.

Finally! We can now print this out, cut it, and test fit it. (Note, I'm too lazy to get out the vinyl cutter and cut the part out automatically - so it's going to be a hand-cut, using the age old method of scissors.)

The test fit perfectly. Now I can print out another one, glue it to whatever will back this up, cut and machine it out. That will complete the rear bumper, or anything from the doors back except for the sound system.
It was around this time that I realized no one carries a bracket, no one has a bracket for sale from old cars, and the Assembly sheets from the factory show no bracket at all. Really? I went through all of that for nothing?
Yup. Good exercise, though. Now to install the plate.
As I've dug in further to my car, trying to get license plates installed, I'm finding I just can't get parts. Machining the license plate holder was one thing, but now I have to make a light bracket, plus I have to figure out the screws for the lower plate, but I don't want to purchase them in order to make the custom brass ones. Here we go. Let's throw in the assembly manual diagrams :


In the first diagram (page "407"), the screws are #2, or part number 3974037, for the license plate light bezel mounting.
In the second diagram (page "473"), I'm looking at #3 (part number #3907444) for the plastic mounting nut (the bracket [#7] is part # 339142).
First, lets hit the lower screws for the plate fastening. Identifying the screws shouldn't be too difficult, as the plastic sockets do not come threaded for a specific example. It should be as easy as identifying the largest through hole diameter (call it the largest minor diameter), and also the largest entry point diameter. From those two measurements, I should be able to deduce the screw size using screw dimensions.


The largest hole was 0.193". The small end was 0.128" in diameter.
It was at that time I stupidly realized the package that had been left unopened HAD THE STUPID SCREWS!

The screws had an outside diameter of 0.240", and a thread pitch of 14. The depth isn't much, because these are essentially wood screws, but I have a sneaky suspicion that any 1/4" screw would fit. It also tells me the threads can be 25% larger than the hole, and I expect a course thread would be just perfect, so a 1/4"-20 will be fine.
This allows me to use the above criteria in calculating the next screws for the license plate light. Let's measure things up and see what things show as.


The largest fit diameter did not go all the way through, at 0.139". The largest that did go through was 0.133" diameter. Looking at the Machinery's Handbook, to see what matches :

With a minor diameter that cannot exceed 0.139" or 0.133", and a scan of the table, we find the maximum's minor diameter of a #10 screw is a 0.1376". The #10 screw in my mind is a wee bit too big, so it is smaller than that.
The major diameter of the screw has to be at least 0.133" in order to engage the hole with the threads at all, and that means #5 (major diameter between 0.1172" and 0.1240") will absolutely not engage the hole.
That leaves a #6 and a #8 for the most common sizes (I am not going to do a #7 or a #9 - they are too odd). With the ranges of a #6 between 0.1293" and 0.1369", it is on the "barely" side. That leaves only a #8 screw, with a max 0.1553" and 0.1629". Course threads would mean a #8-32 screw, or a #8 wood screw.
Okay, screws identified! I had the upper screws for the plate made already in a previous post, so it's the same basic process. First, turn down just a little length for the smaller light screws (#8-32's), and use a die to cut the threads (yes, I could thread it on the lathe, but I don't want to have to re-tract, and line up, and this way I know I'm not bending a long slender part).

At that point, i can turn down the next section of the screw, and the die keeps the thread perfect.
The final screws, the wood-screw-like, lower bolts that had the angled thread on the tip, was going to be fun. I did not want to try turning an additional, tapered thread on this point because the complexity was something I did not opt to choose, so I turned a pointed tip and then threaded anyway. Note that I am well aware that the quick change gearbox, set up for 20 thread per inch, is right on the money. I do not need to repeat this on these screws (I'd already validated on the previous ones), but I've found that marking up the part before turning gives me a good visualization of when I am deep enough to break out the threading die for 1/4"-20 to ensure a perfect thread.


Now I have all six screws ready to go.

I just need to install the plate light, then the lower bracket (maybe I will have time in the next evening or two).
After finishing the rotary broach, and having a 5/32" broach ready to go (the size of hex for my other 1/4"-20 socket machine screws), I was ready to rumble on my machine screws.
I first tried to make it head first so I could punch the hex hole in it.

I did this twice before I realized I was wasting more material because I could not test it, and concentric surface on the other side was inconsequential.
Third try is the charm. I used some aluminum and realized that all I need to do is get the angle less than the washer so that the upper edge would seat. I just wanted it close enough. Truth be told, it is nearly half way between 45 and 60 degrees, but since 60 degrees would have given me the outside seat, I went with that with the tool squared up.
On my next try, I opted to reverse the construction - turn the outside diameter (0.600", then cut the 60-degree, large chamfer for the bottom of the head to the 1/4" diameter, then thread it on).

Once that was ready, it was time to part it off.


In the previous photos, I had not yet cut two other slots (not all the way through) on the chucking nut in order to properly grip the screws. Set in the chuck after the cuts, I proceeded to drill a 5/32" hole as a start, re-chamfer the entry point on the drill, then broach it through.

And that is now two license plate bolts complete. I need to fabricate the light bracket and install the lower plate before I can install these, but two more parts have been completed.
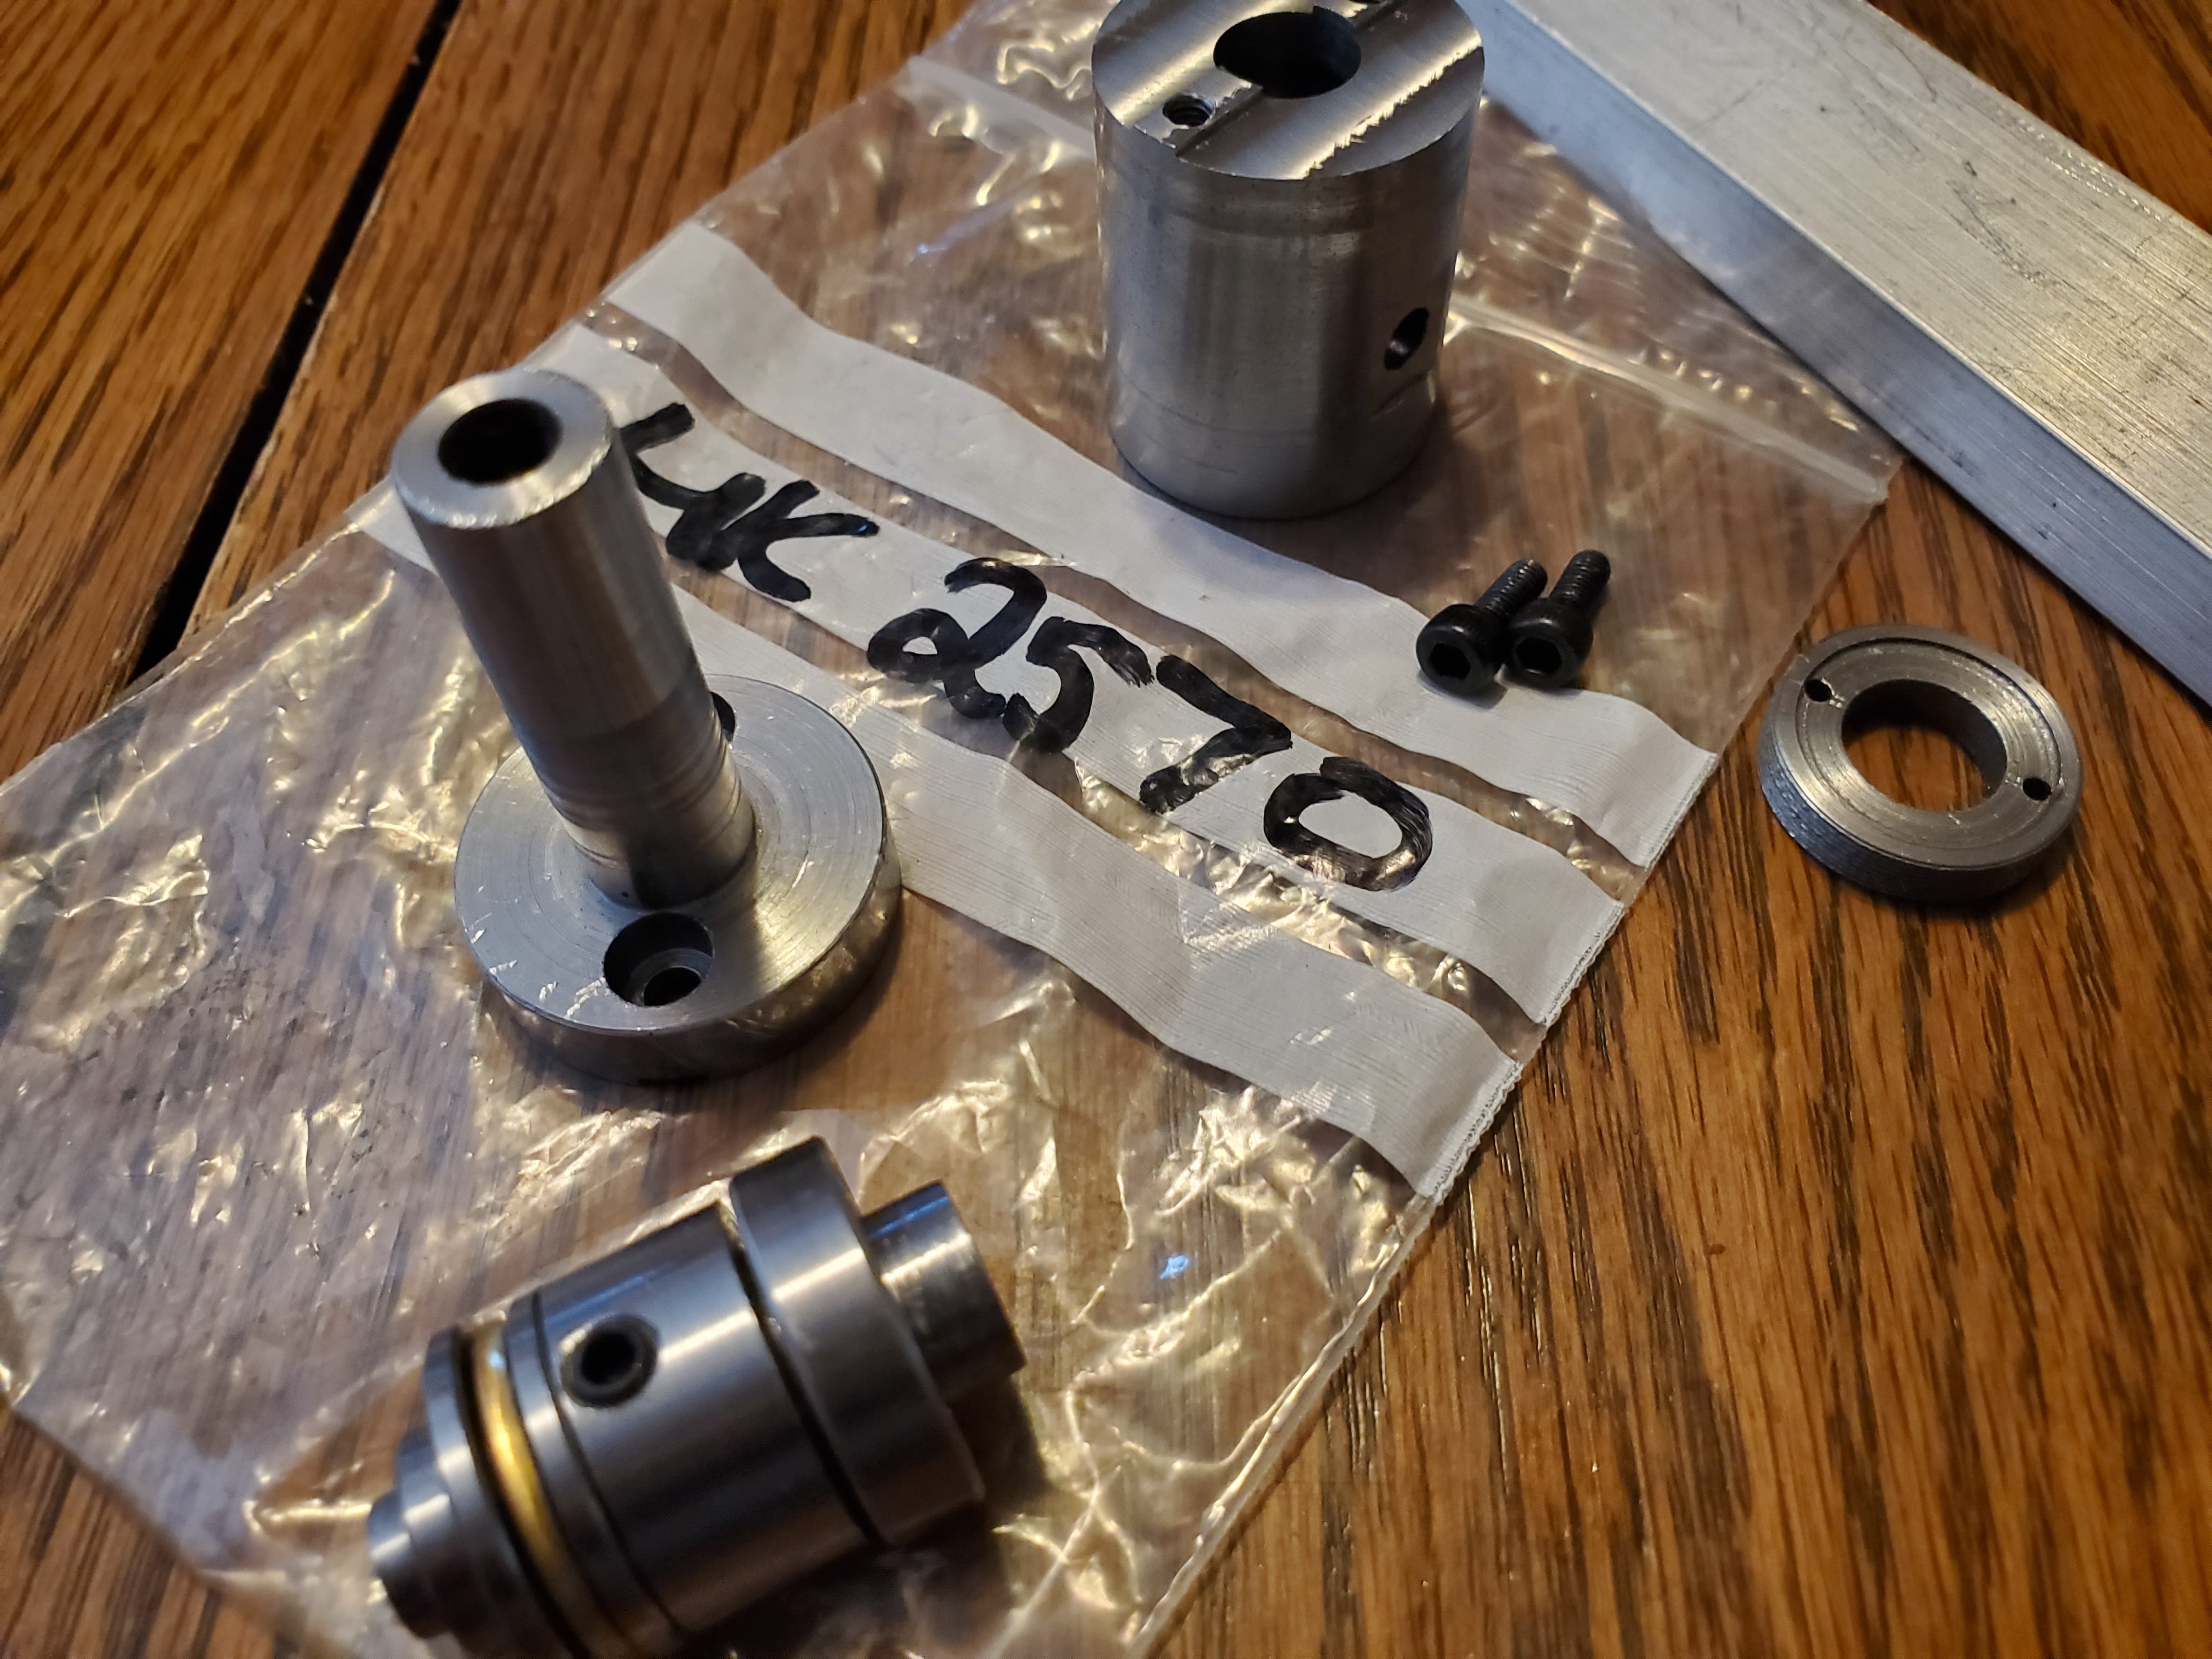
On one of my projects (the drafting kit), I had a beam compass that I needed to increase the radii on. I bought a rod to match what it had, and then promptly realized I needed to drill a hex-shaped hole lengthwise. Nearly any machinist who has been around for a while (I have to say nearly, because it took me a long time to find this out) will be familiar with tools to cut holes in shapes that are not round. These tools are called "rotary broaches", and they can get pricey (e.g. the bit itself comes in cheaply around $61 from some random supplier found on the ol' Internet).
So, I found a build-it-yourself rotary broach kit and ordered it from Hemingway Kits. It uses a designation for "FCMS" (or something similar), which is essentially "cold rolled steel".
The tools required for this are a milling machine (the Harbor Freight special will do), and a lathe, along with an M3x0.5 tap.
First is to face, bore and turn the locking lug. Then thread it (the measured drawings have measurements in metric and imperial, so it was threaded at 52 TPI).
Once done, make the shank. It is essentially a part made on the lathe, but the mill is used to cut a flat groove 4mm wide for alignment.


This comes after the lug itself because you want a good, secure fit, and the locking lug can be used to ensure you don't cut threads too deeply on the inside. In other words, you will fit this to your lug. Once done, the part is parted (no pun intended) off, and taken to the milling machine where it is set up at a 1-degree angle. I used a collet block to hold it, so I set a 0.017" lift 1" from one side to give me exactly a 1-degree angle.


You might notice the appearance of the aluminum bar with pins and a hole - I quickly realized in a previous step (when fitting the locking lug to the body) that I needed a spanner wrench to match, so I whipped one up.
The next part required is the broach's "spindle". This is the part that actually holds the rotary broach itself. Following the specs, I slapped it together. Now, I know I am supposed to wait until I have an actual broach, because angles and math, but I wanted this complete. Here is the parts, followed by assembly.


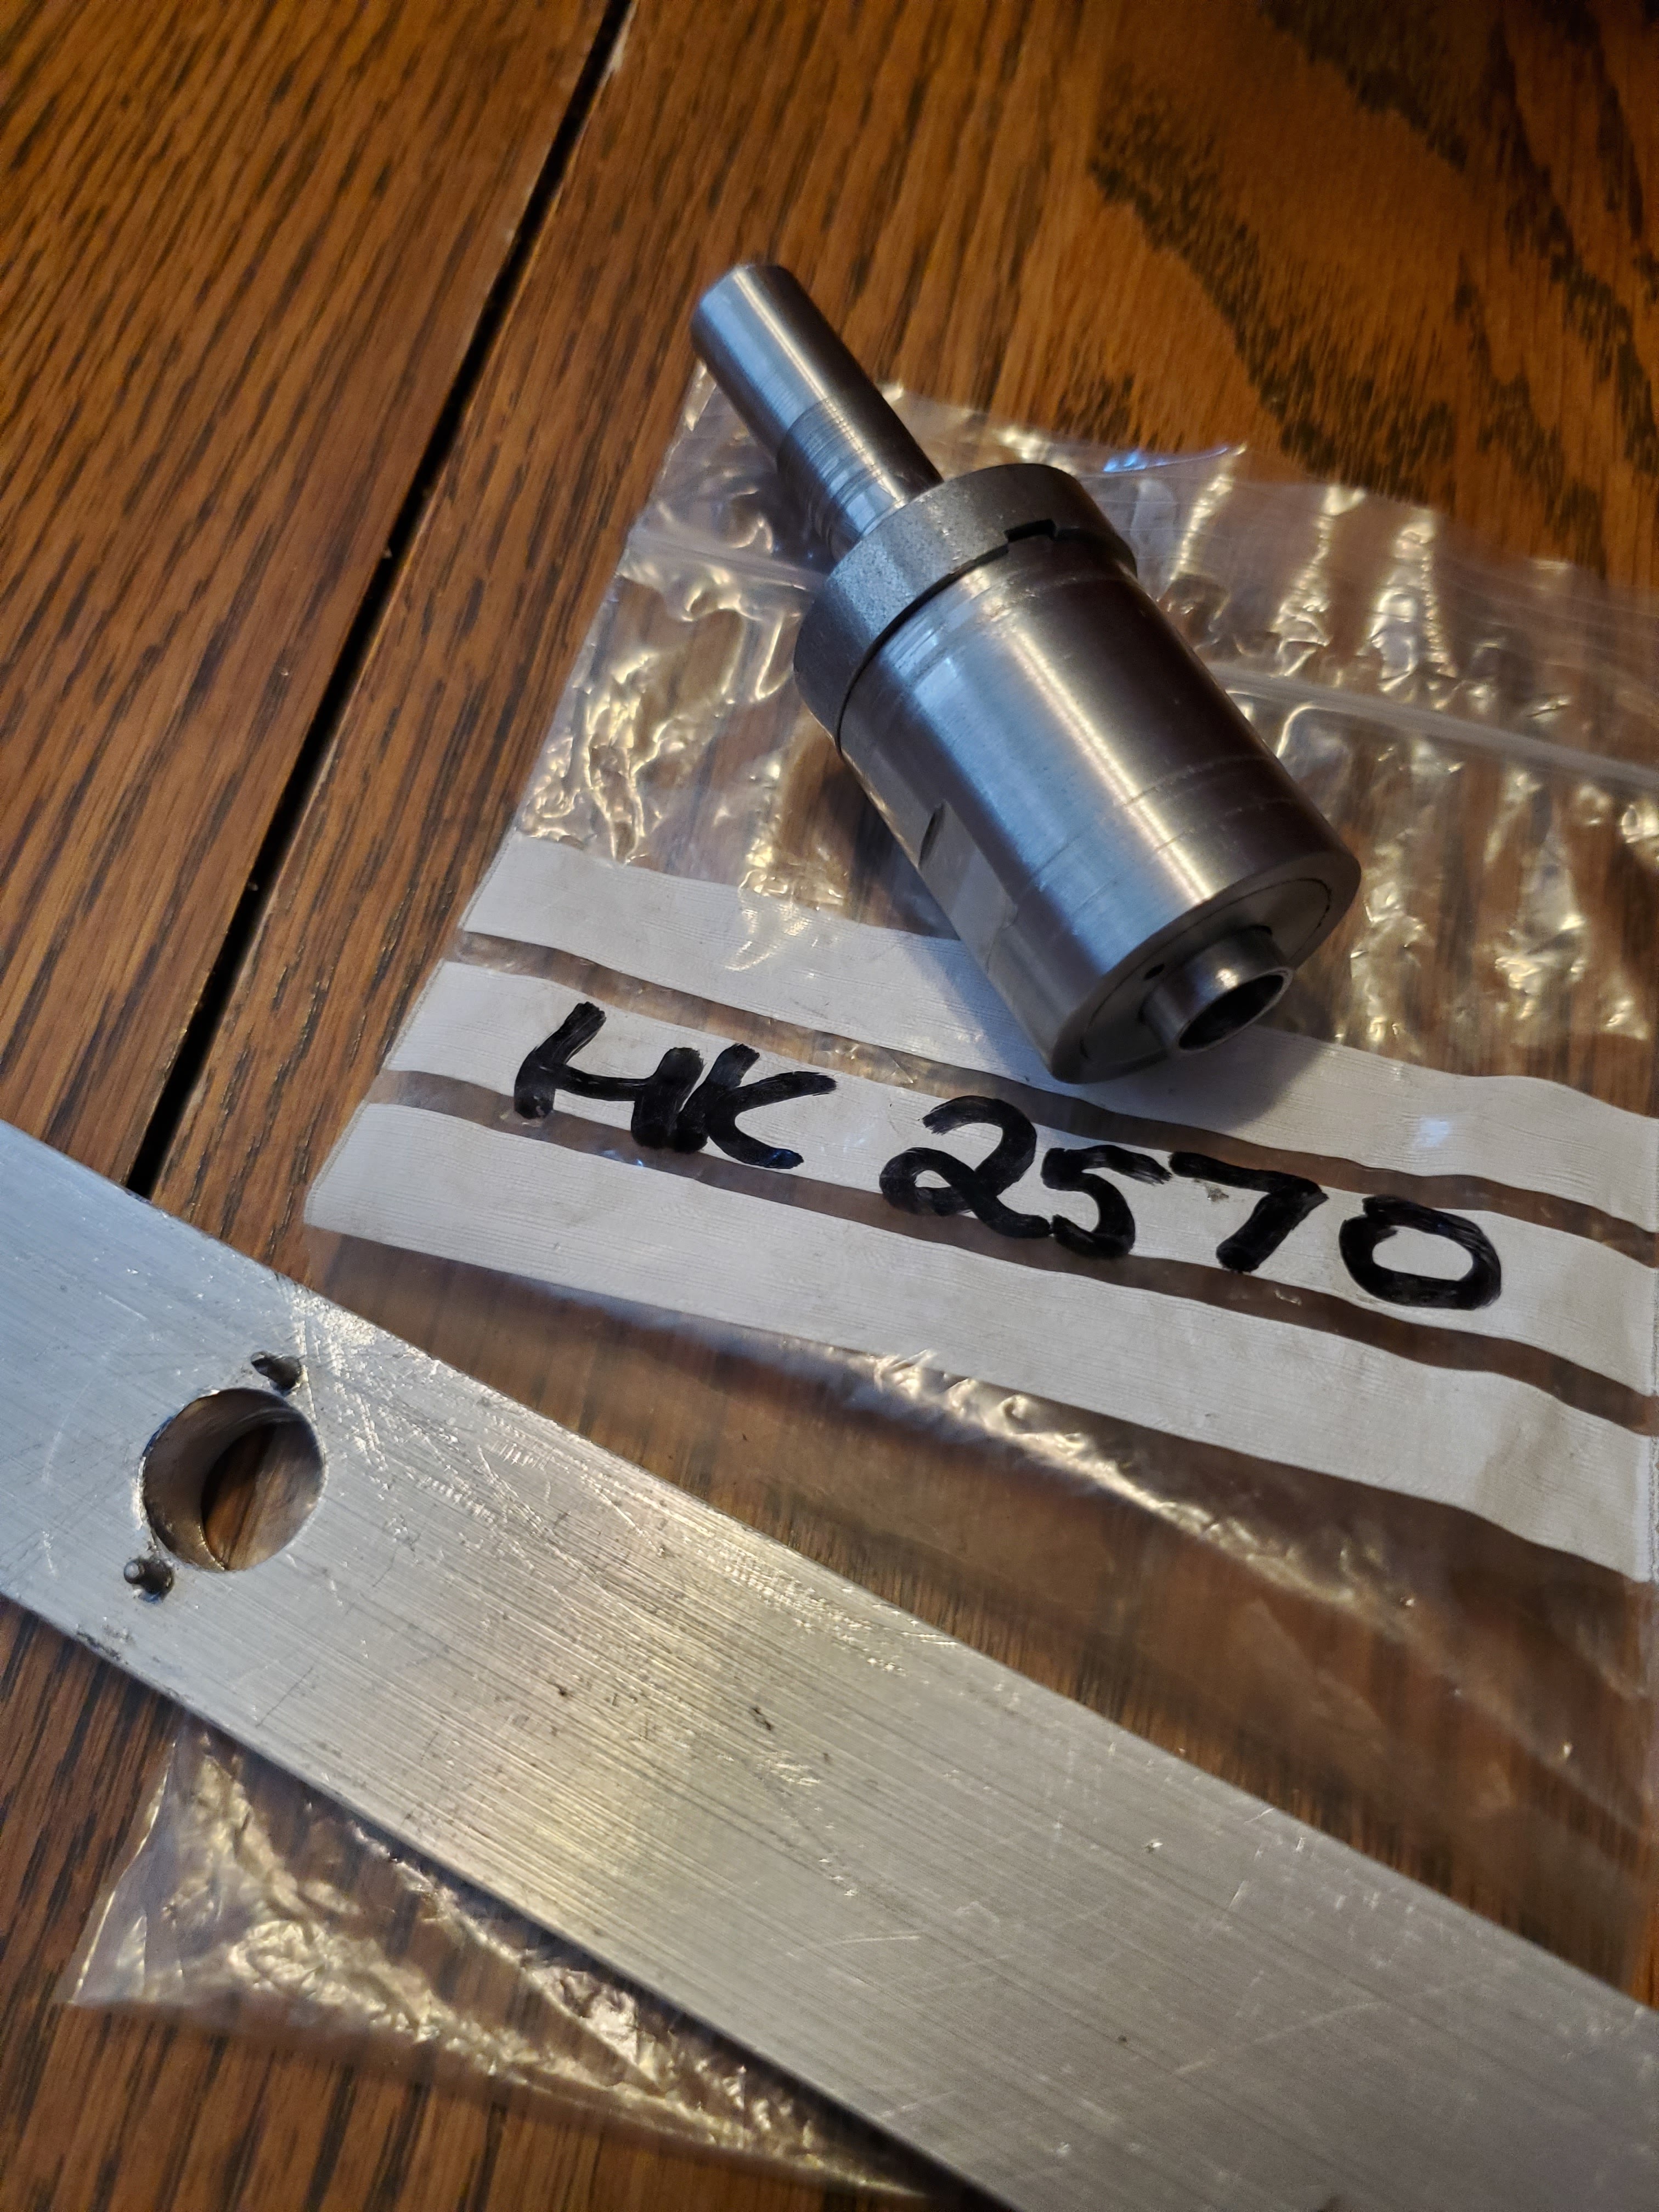
After the spindle, I measured, and re-did the math for how long broaches are going to be based on the angles of everything. After recalculations (and making tools along the way to measure how far I am when I am really close to the lathe spindle), I whipped a broach up. Quite fun using a hex collet block in the mill at an angle. It was a bit sketchy - it was a tool makers vise, in a tilting vise. But, once I got the feel for taking cuts, it went pretty quickly. This is a 5/32" for what I assume to be a 1/4"-20 drive.

Once shaped, I needed a slight cone. Most people seem to use a Dremel to grind, but I opted to chuck in a small hollowing wood carbide holder because of it's diameter, and then just used it like a normal tool in the South Bend.

With that, all I need to do is harden the broach and then I can start making car parts again! I grabbed some brick and a torch, and a jar filled with ice water, and heated it up to red hot (actually, orange hot). Then just a quick dunk, agitating (shaking it to prevent steam from creating too much of a barrier) it the whole time until it is cool to the touch.


I scraped it against some aluminum, and it definitely scored it. This thing is, in theory, ready to rumble. I will to a test cut just to make sure this is going to work before I proceed, but this tool is DONE!
I've been working on a rotary broach kit from Hemingway. As I started the phase of making the first broach, I encountered a bit of a problem. The collet set I'm using requires me to get fairly close to the headstock, and the micrometer doesn't actually fit in the space I have to subsist in.
I need a new way to measure.
I grabbed some cut-off chunks (and "scrap parts") I had laying around and built two of them. One of them connects to the V-ways like we normally see, but the other one uses two 1/4"-20 holes right above the gear box. This would allow me to offset a dial indicator much farther away. I had a gits oiler right there, so I needed to mill around it.
First was getting the parts to square. Then, machining out a slope and the v on the moveable indicator holder. I then drilled and tapped 1/4"-20 holes in two directions for the dial indicators (specifically so I could orient the dial indicators as either facing upward or facing outward), and cut grooves so that the indicators can nestle down in and be secure. At that point, I drilled (and counter bored) a 3/8"-16 through hole in the middle, and machined the bottom clamping jaw out of a scrap bin part.


Once that one was complete, I ran a cut-off block through the mill to square it up as well as notch for the gits, and used transfer screws to set the drill points for this new block. I did have to make a few tweaks, but I also drilled and tapped two 1/4"-20 holes to hold the dial indicator. This dial indicator was only going to face upward. Here they are without the indicators attached.


Here they are with dial indicators on them.


These will be absolutely sufficient for my next steps on the broach - cutting the broaches to exact length. Here is the micrometer attachment, showing the length (which is how much it obstructed the carriage movement).

This is a win, and allowed me to continue on the broach project.