

On one of my projects (the drafting kit), I had a beam compass that I needed to increase the radii on. I bought a rod to match what it had, and then promptly realized I needed to drill a hex-shaped hole lengthwise. Nearly any machinist who has been around for a while (I have to say nearly, because it took me a long time to find this out) will be familiar with tools to cut holes in shapes that are not round. These tools are called "rotary broaches", and they can get pricey (e.g. the bit itself comes in cheaply around $61 from some random supplier found on the ol' Internet).
So, I found a build-it-yourself rotary broach kit and ordered it from Hemingway Kits. It uses a designation for "FCMS" (or something similar), which is essentially "cold rolled steel".
The tools required for this are a milling machine (the Harbor Freight special will do), and a lathe, along with an M3x0.5 tap.
First is to face, bore and turn the locking lug. Then thread it (the measured drawings have measurements in metric and imperial, so it was threaded at 52 TPI).
Once done, make the shank. It is essentially a part made on the lathe, but the mill is used to cut a flat groove 4mm wide for alignment.

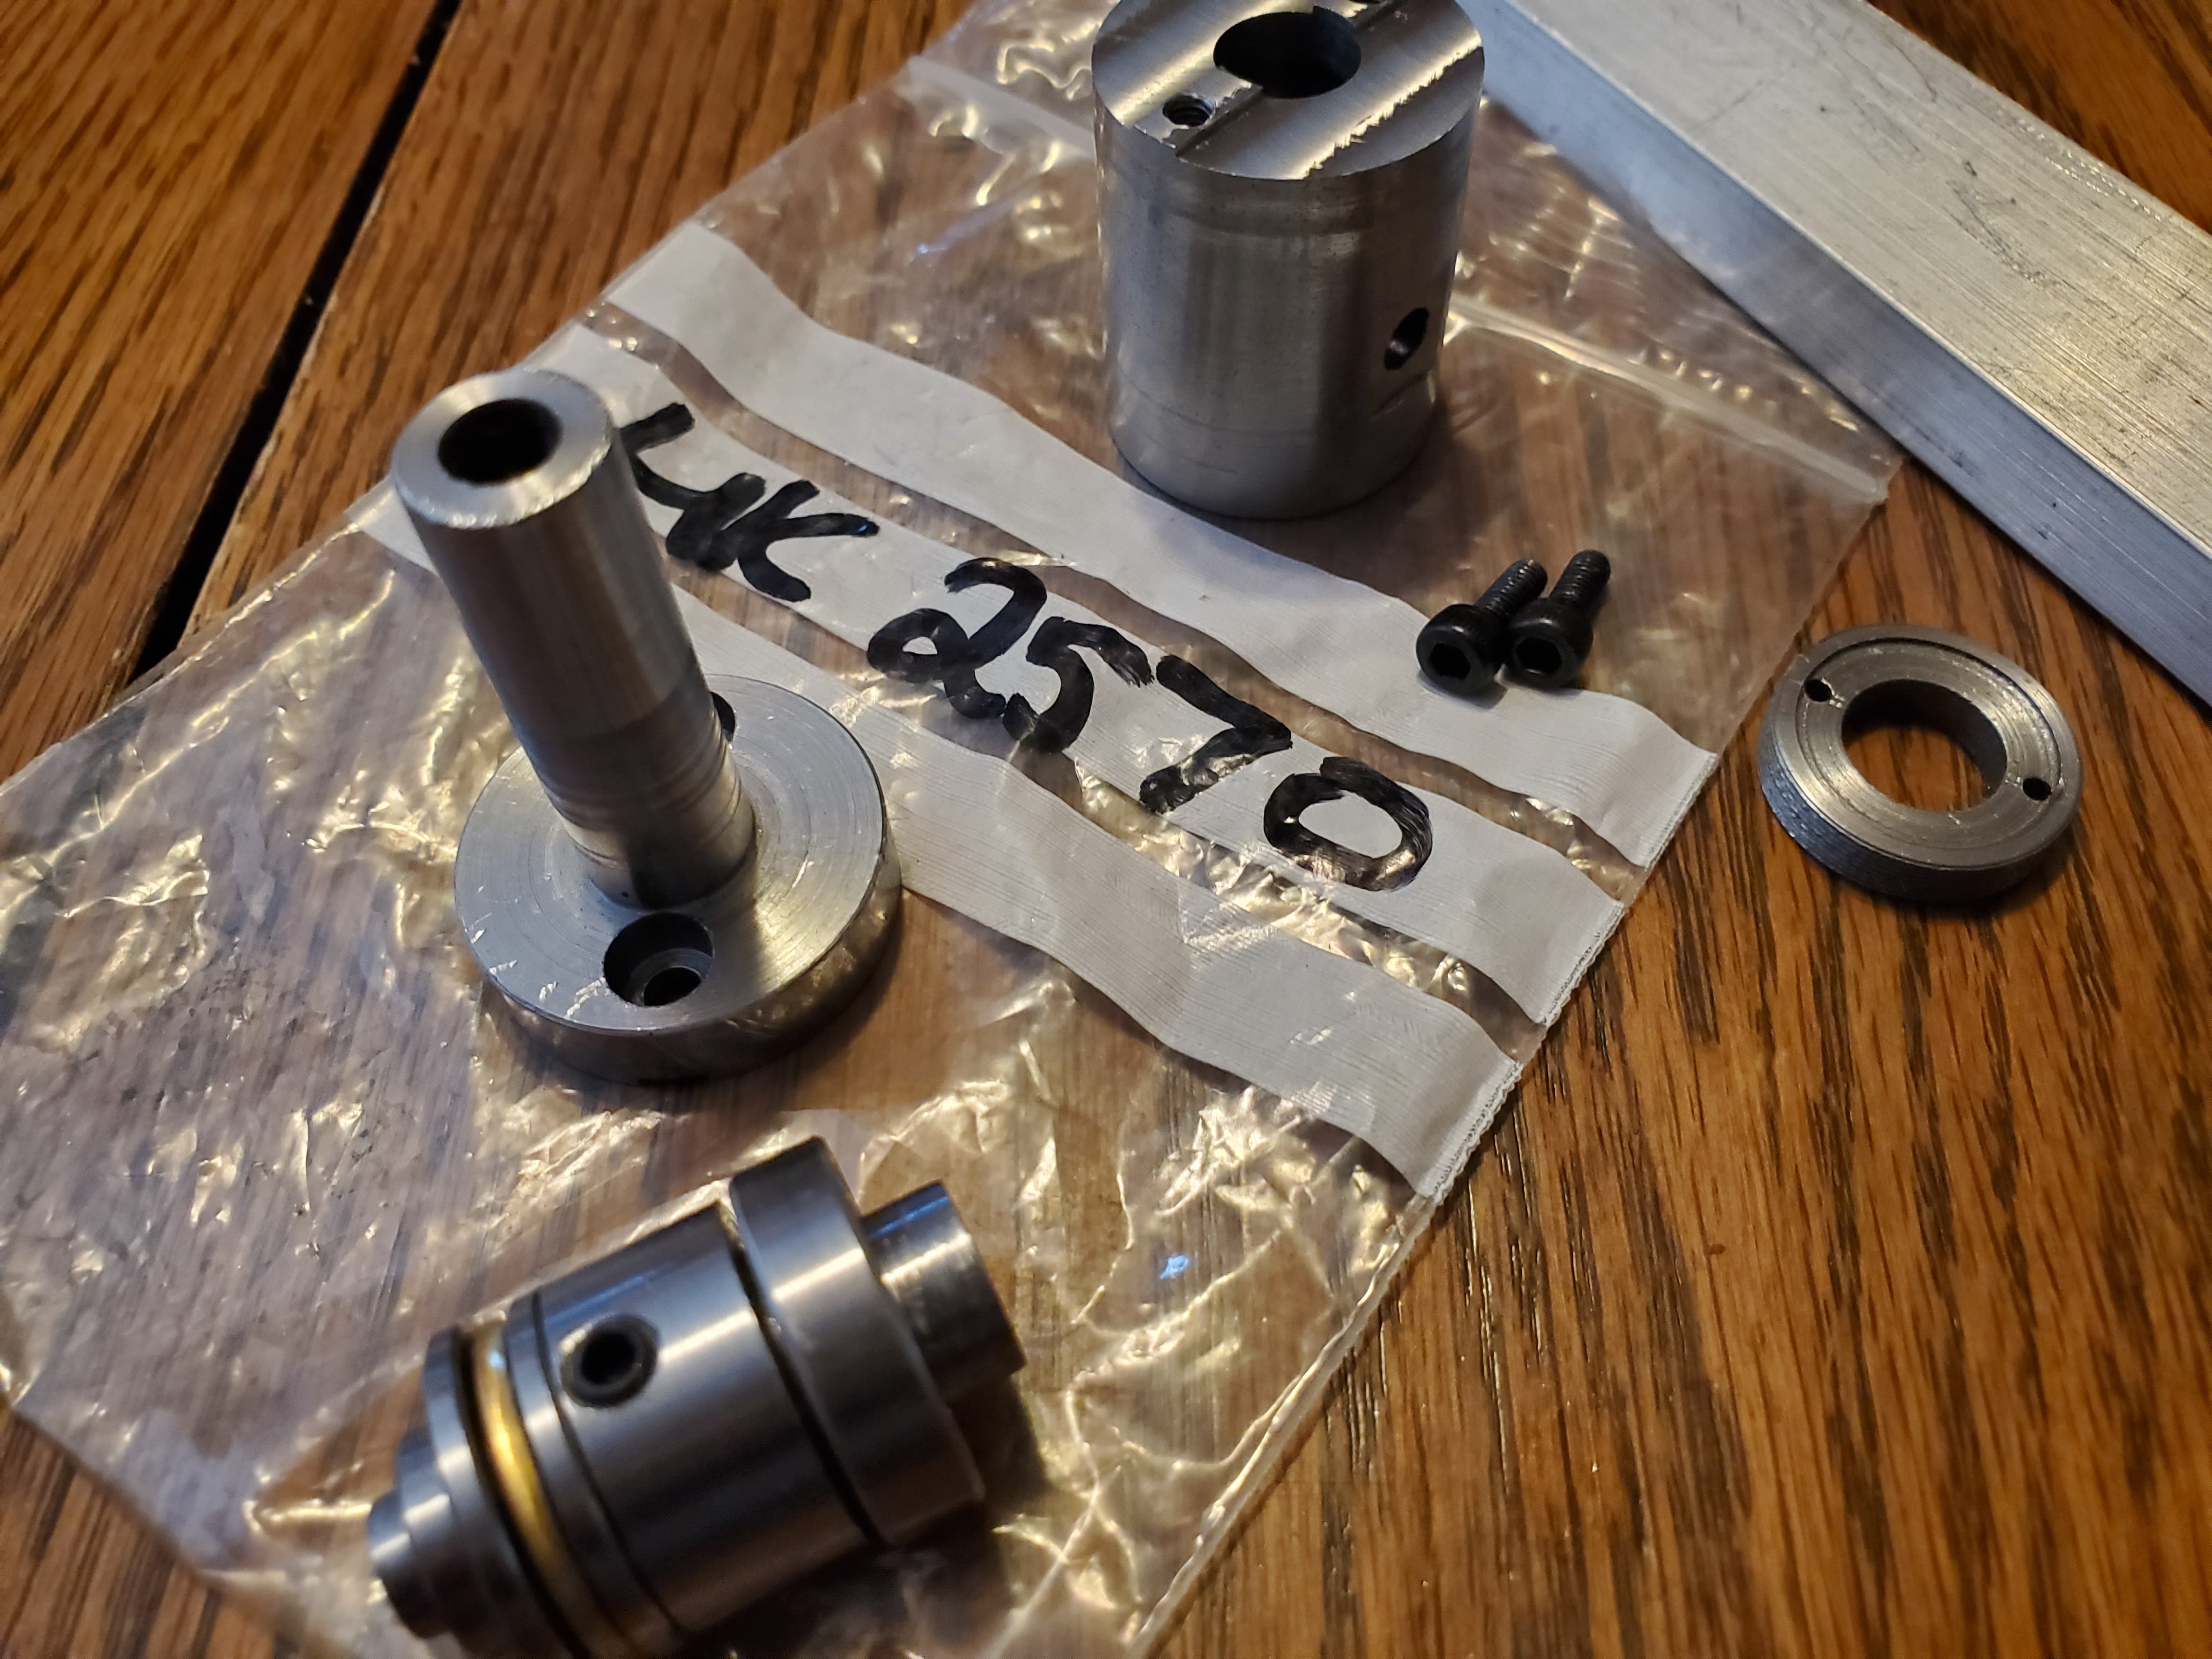
Next comes the body - face it, bore it (different sizes to different depths, then turn the outside of it (this is exact). Once this is done, you will need to cut an internal thread to match your locking lug.

This comes after the lug itself because you want a good, secure fit, and the locking lug can be used to ensure you don't cut threads too deeply on the inside. In other words, you will fit this to your lug. Once done, the part is parted (no pun intended) off, and taken to the milling machine where it is set up at a 1-degree angle. I used a collet block to hold it, so I set a 0.017" lift 1" from one side to give me exactly a 1-degree angle.

Then the back (parted area) is milled flat there, and then a boss is completed flat along that angle to match the groove in the shank. You have to drill the two holes to bolt the shank and the body together, and then you can tap those holes. I milled small flats on the sides on opposite ends using the boss as a horizontal index. Those two flats allowed me to get a solid grip on the body when threading. Hint - use tapping fluid with an M3 tap. It makes it much easier.

You might notice the appearance of the aluminum bar with pins and a hole - I quickly realized in a previous step (when fitting the locking lug to the body) that I needed a spanner wrench to match, so I whipped one up.
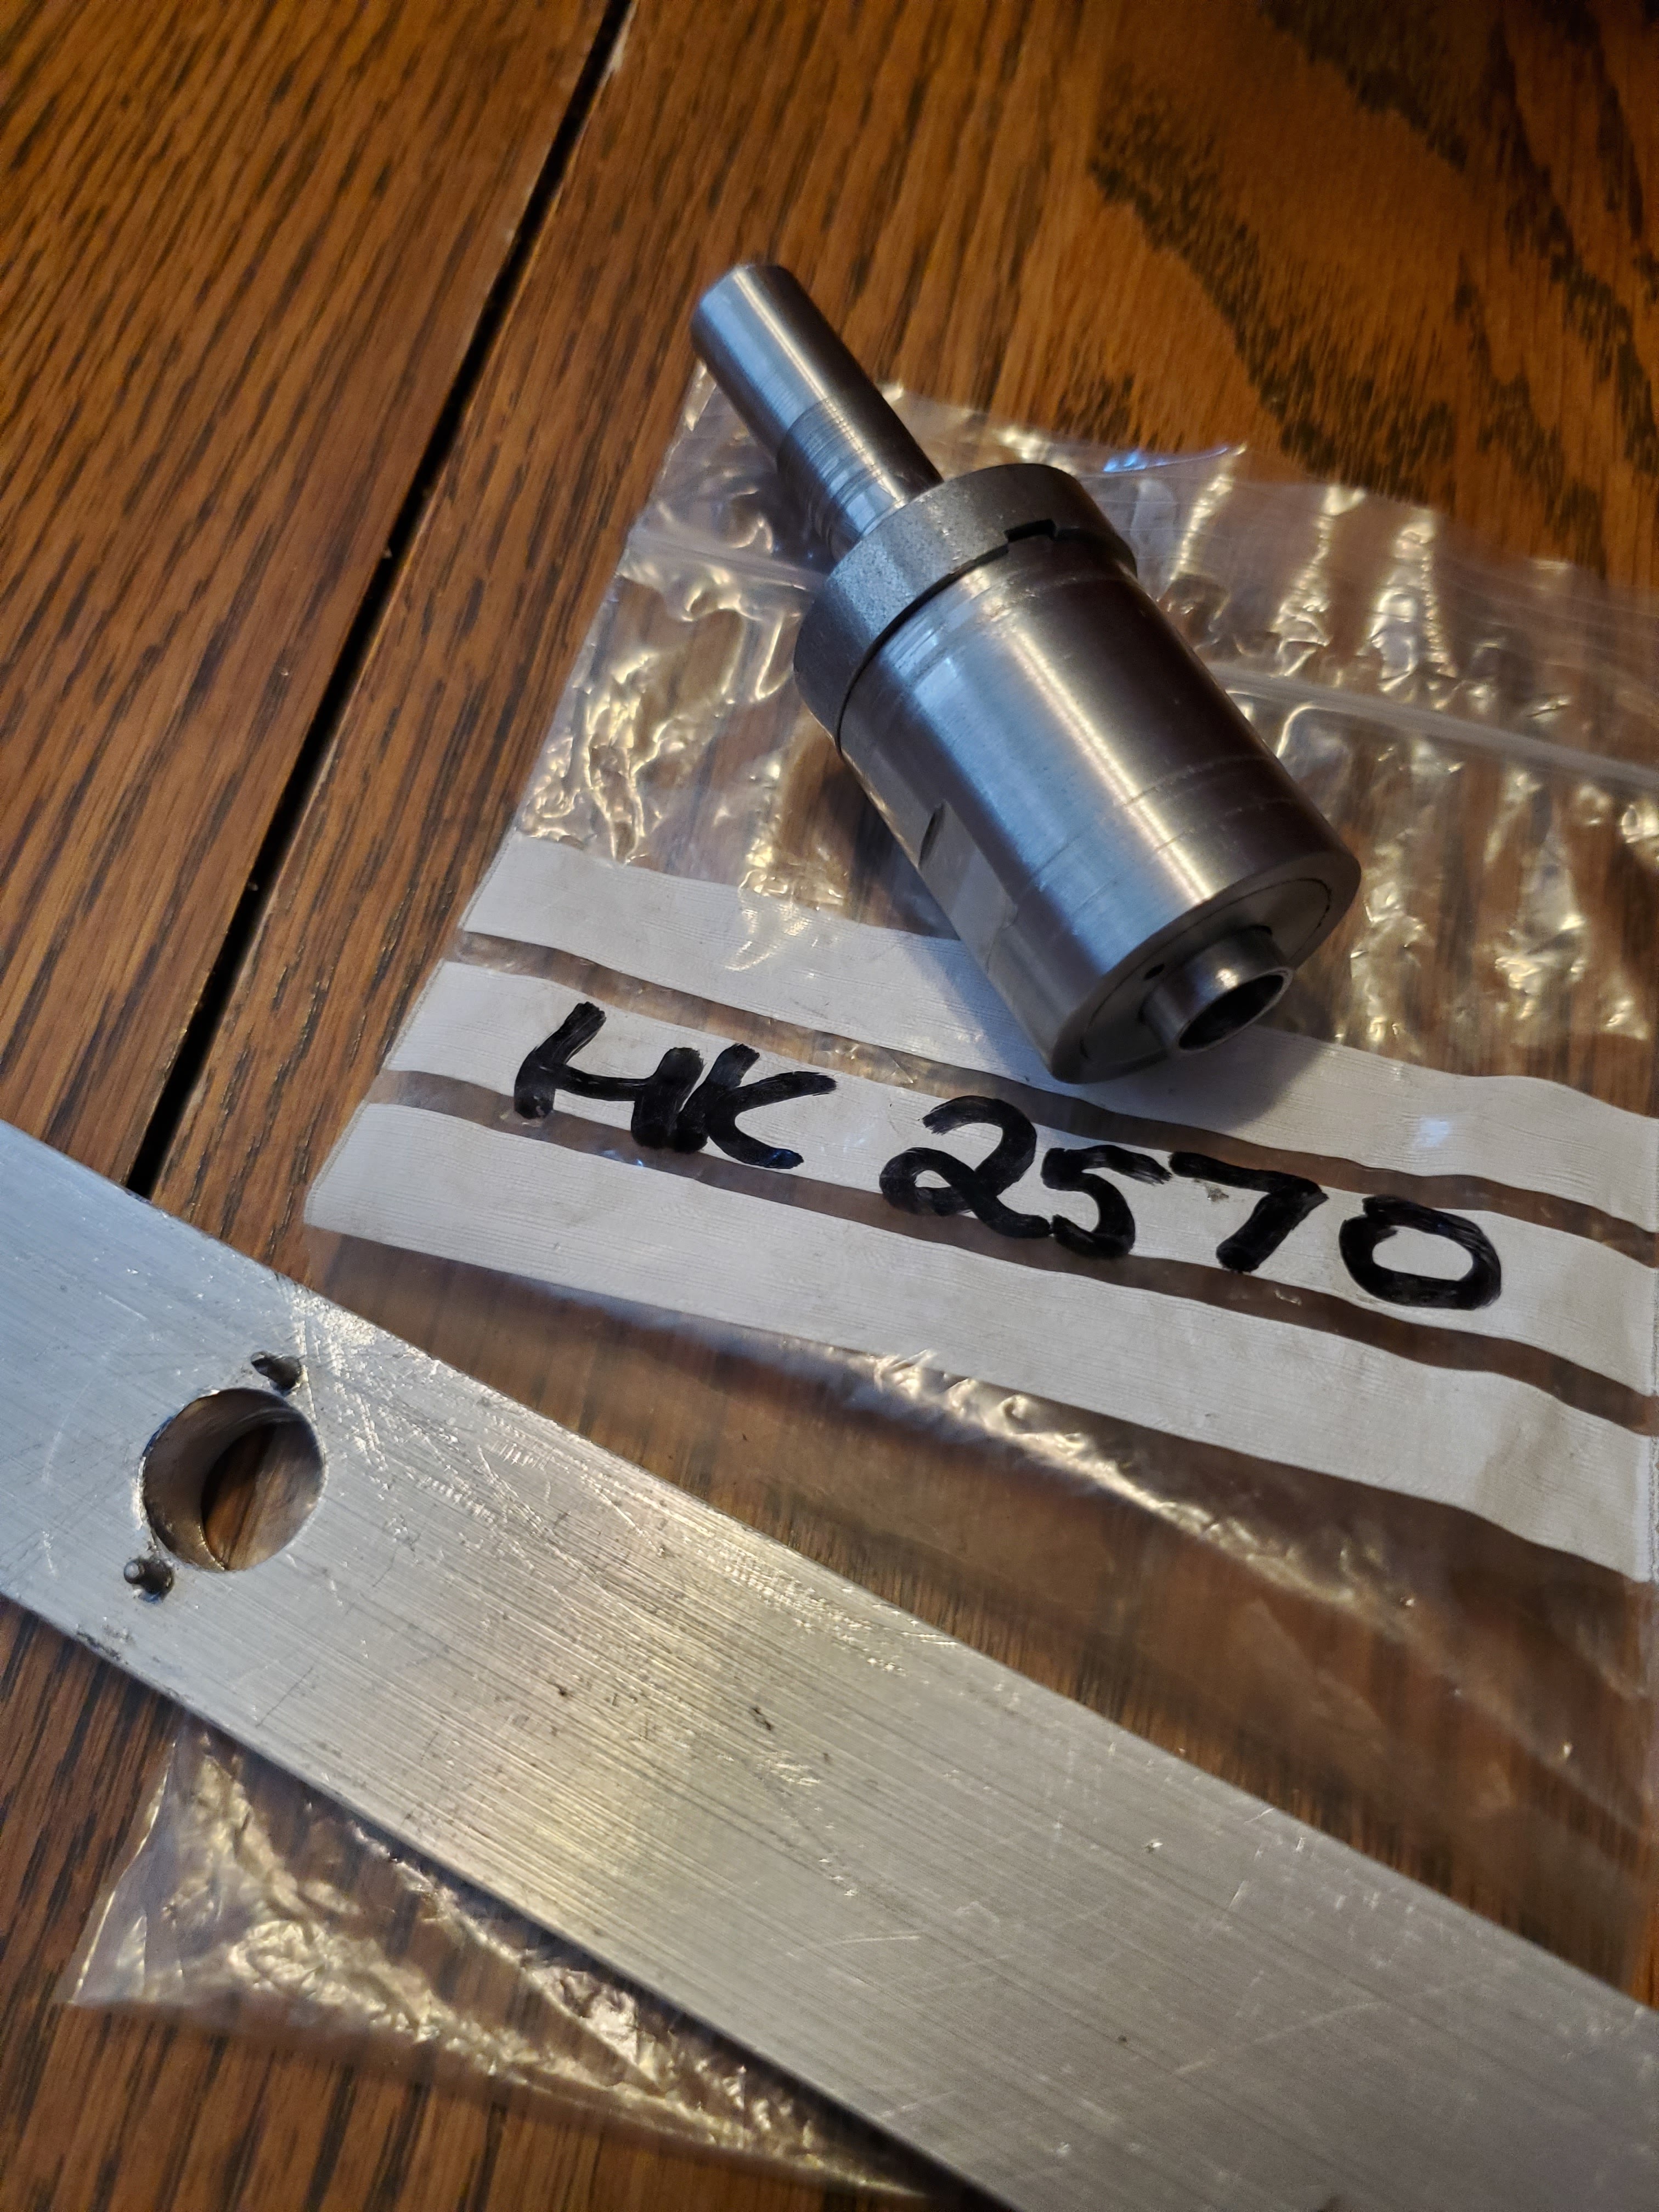
The next part required is the broach's "spindle". This is the part that actually holds the rotary broach itself. Following the specs, I slapped it together. Now, I know I am supposed to wait until I have an actual broach, because angles and math, but I wanted this complete. Here is the parts, followed by assembly.


After the spindle, I measured, and re-did the math for how long broaches are going to be based on the angles of everything. After recalculations (and making tools along the way to measure how far I am when I am really close to the lathe spindle), I whipped a broach up. Quite fun using a hex collet block in the mill at an angle. It was a bit sketchy - it was a tool makers vise, in a tilting vise. But, once I got the feel for taking cuts, it went pretty quickly. This is a 5/32" for what I assume to be a 1/4"-20 drive.

Once shaped, I needed a slight cone. Most people seem to use a Dremel to grind, but I opted to chuck in a small hollowing wood carbide holder because of it's diameter, and then just used it like a normal tool in the South Bend.

With that, all I need to do is harden the broach and then I can start making car parts again! I grabbed some brick and a torch, and a jar filled with ice water, and heated it up to red hot (actually, orange hot). Then just a quick dunk, agitating (shaking it to prevent steam from creating too much of a barrier) it the whole time until it is cool to the touch.


I scraped it against some aluminum, and it definitely scored it. This thing is, in theory, ready to rumble. I will to a test cut just to make sure this is going to work before I proceed, but this tool is DONE!
No comments:
Post a Comment