

- Lots of facing
- Interrupted cuts (making something round that isn't)
- Knurling
- Off-center drilling
- Threading
- Internal threading
- Indexing (I have to do this on the mill, this can easily be done on a lathe with the right hardware)
- Slitting (for the clamp, I have to do this with a bandsaw since I don't have slitting saws for the mill)
- Creating pockets (Milling them, they can be drilled)
- Ball turning (for the pivot socket)
- angled facing (for the pivot socket clamp)
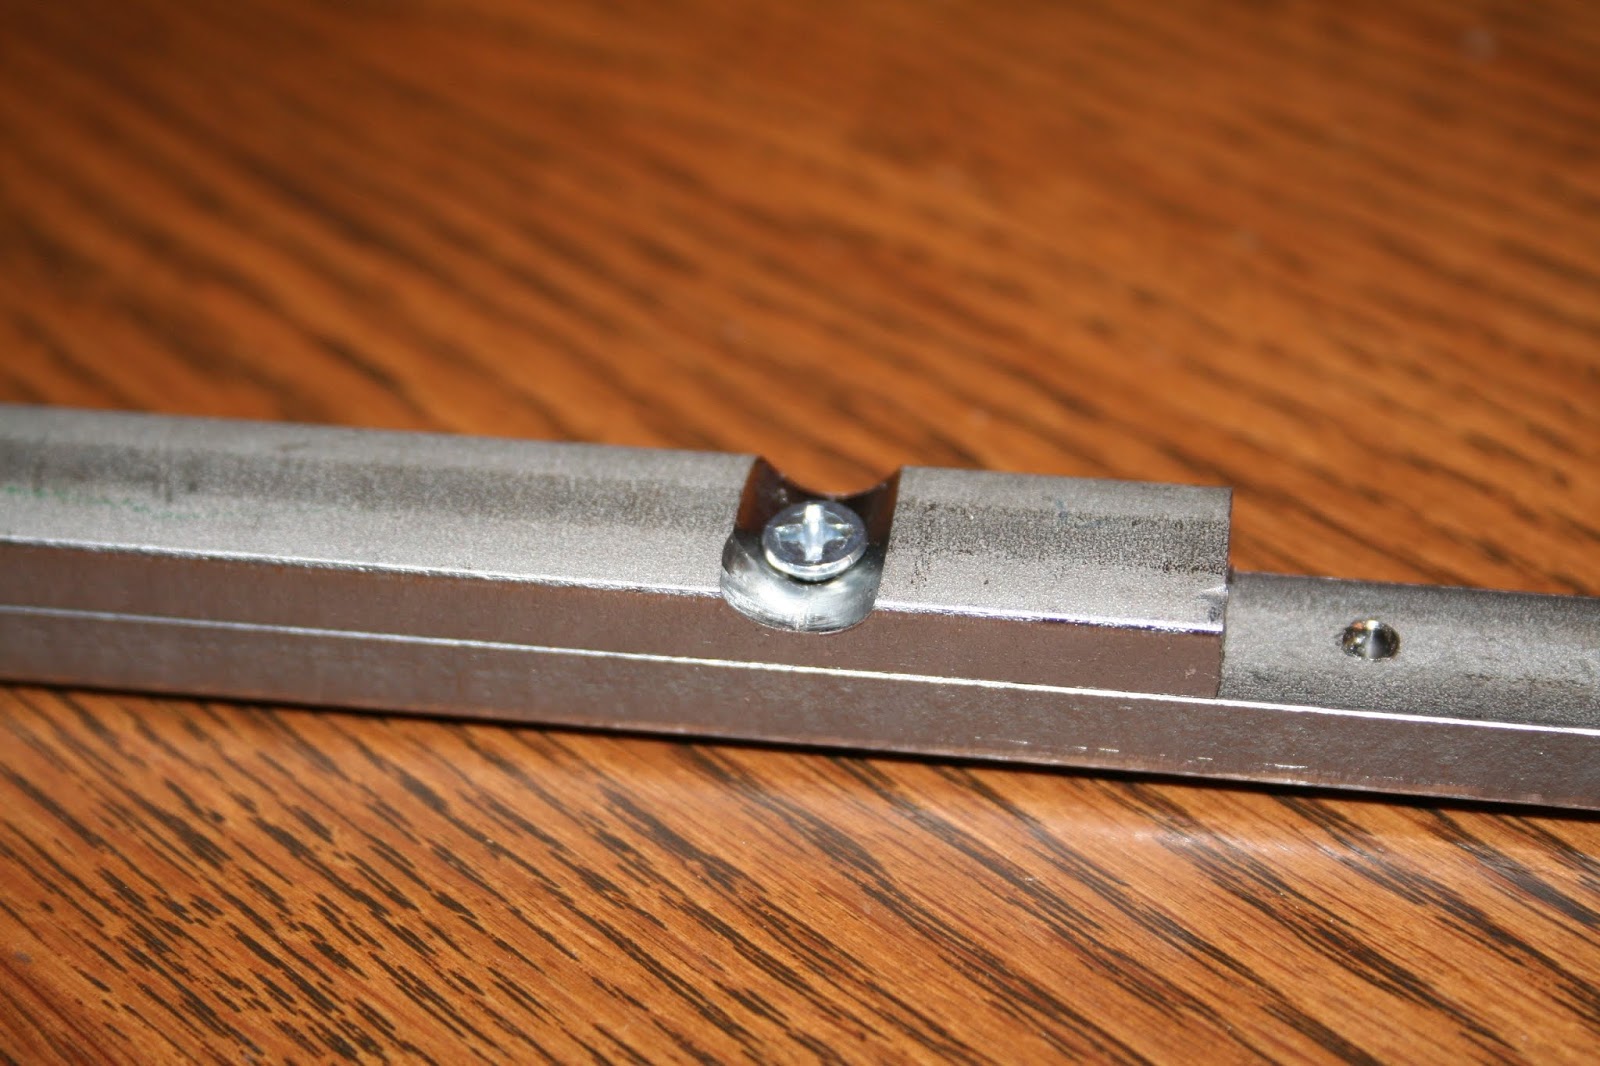
First, I built the jaws. Since I wanted a good, round finish (not an oval that you'd get by taking round stock and cutting out some of it), I used two pieces of 1/2" x 1/4" stainless flat bar. I notched a rounded slot in it using the mill (for a pivoting washer to allow easy angle changes), and drilled a hole through it for a clearance fit for a 6-23 screw :


Next, I drilled and tapped another piece of stock (for the matching jaw) for a 6-32 screw. Note that small taps break easily in stainless steel - but, stainless is what I wanted. After tapping the second side, I screwed the two pieces together :


At this point, I'd advise you to mill some pockets on the inside of these two jaws for springs. I waited until I had rounded the jaws (seen later), and that made it more difficult to get the jaws level.
This gave me two independent pieces that would fit together quite nicely as jaws, and would have a perfect roundness - after turning the pieces down. I chucked them up in the 4-jaw chuck, got them as close to center as I could, and turned it round with an interrupted cut. I also bevelled the end closer to the screw in order to have a better point in which to hold the fly hooks. The nut kept things together quite nicely :


The perfect point here is that these two pieces together formed a 1/2" round stock. The next step was to chuck the pieces up into a 1/2" collet, and put a slight bevel on the backs (and get the not-rounded ends so that the outside diameter lip would be symmetrical along the same axis). In the second picture, you can see the beveled edge on the butt side - this is intended so that when a nut is clamped down, the jaw tips pull together :


I milled two round pockets on the inside of the jaws for springs (to press the jaws apart). This is something I'd recommend doing before they are rounded at the lathe, as the stock can fit flat onto your mill ways (or drill press). With a 6-32 brass knurled thumb screw (but no washer), it's looking pretty good :

The washer was made from hex rod that was rounded and then milled flat and drilled. This gives the thumbscrew a little better seat for operation.

The jaws with the pockets :


I needed the horizontal shaft that the jaws would but up against. I had a piece of 3/4" stainless steel (it was already polished), and I needed a fine thread. I ran a 20 pitch thread on both ends :


To get them to connect, I needed a "nut". The nut needed to have an internal thread that matched the 3/4-20 cut above. It also had to have a complete bore the size of the jaw shaft (1/2"), and an internal shoulder the diameter of the jaw butt outside diameter. I chose brass, since my first attempt is to do a brass-and-stainless trying to get it to look halfway decent. This was done using 1 1/4" brass round bar. I used the steady rest because I felt like it was sticking out a little too far.
First, I drilled the inside (I know it should have been the outside first, but the internal bore and threading was the more critical piece of this for the fit). It was bored through for the 1/2" jaws. Another bore was done (not all the way through, but deep enough for the jaw butt lip) for a clearance fit for the jaw lip. Once that was complete, a third bore to the thread depth was done (less than 3/4' obviously, as the outside thread diameter was 3/4"). This was then threaded (my first attempt at internal threading). I made sure it fit before proceeding here. I added a thread relief, just in case. It was then turned down outside, and knurled. I parted it off, and slapped it together :


Yeah, it's looking good so far. The reason for the thread on the back end was purely cosmetic. Having that stick out the back of the stand would have been weird. The rear nut, also internally threaded, was cut from the same 1 1/4" round bar. First, internally bored and threaded. It was then turned down on the outside (except for a larger lip I wanted an indexed way to really grab a hold of this part and turn the hook to different angles), so I decided to use the rotary table. For some odd reason, I didn't want these grooves to be inline with the bar (too simple), so I set it up on an angle on the mill. You could do this on a lathe without the angle, just by drilling holes in the round stock then turning it down and cutting into those holes. I wanted it to be a bit different. The setup for the angle actually took a long time. It was frustrating until I finally got the setup right.

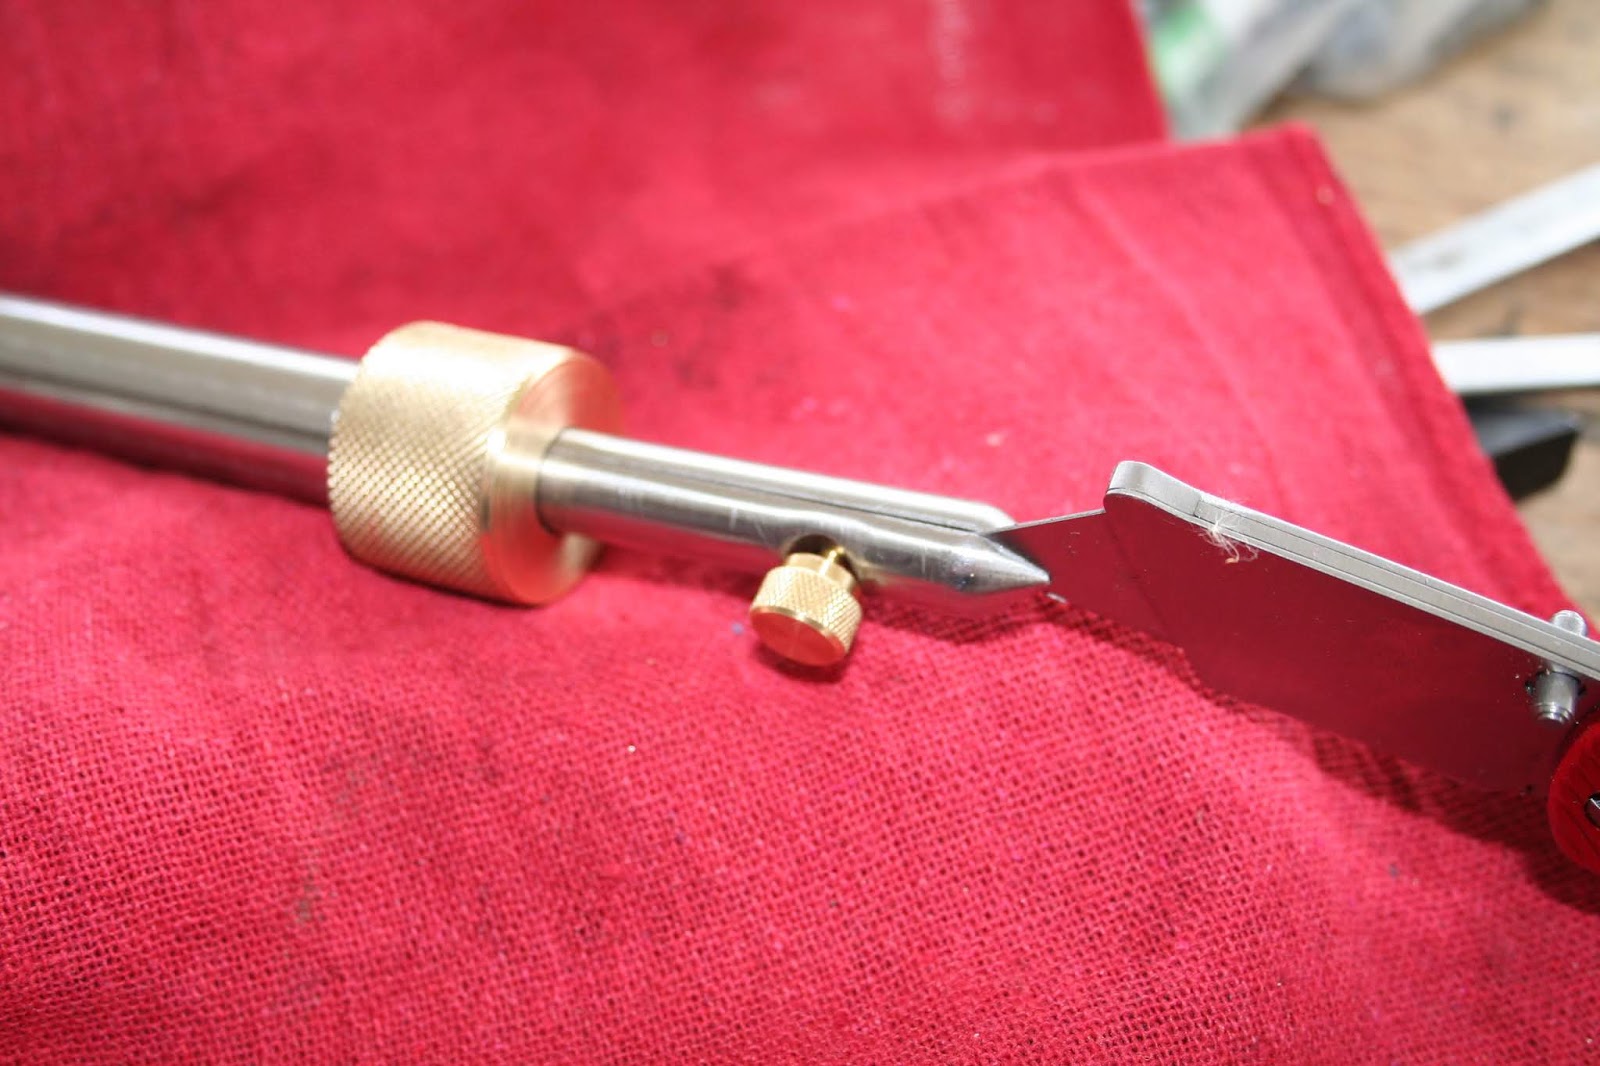
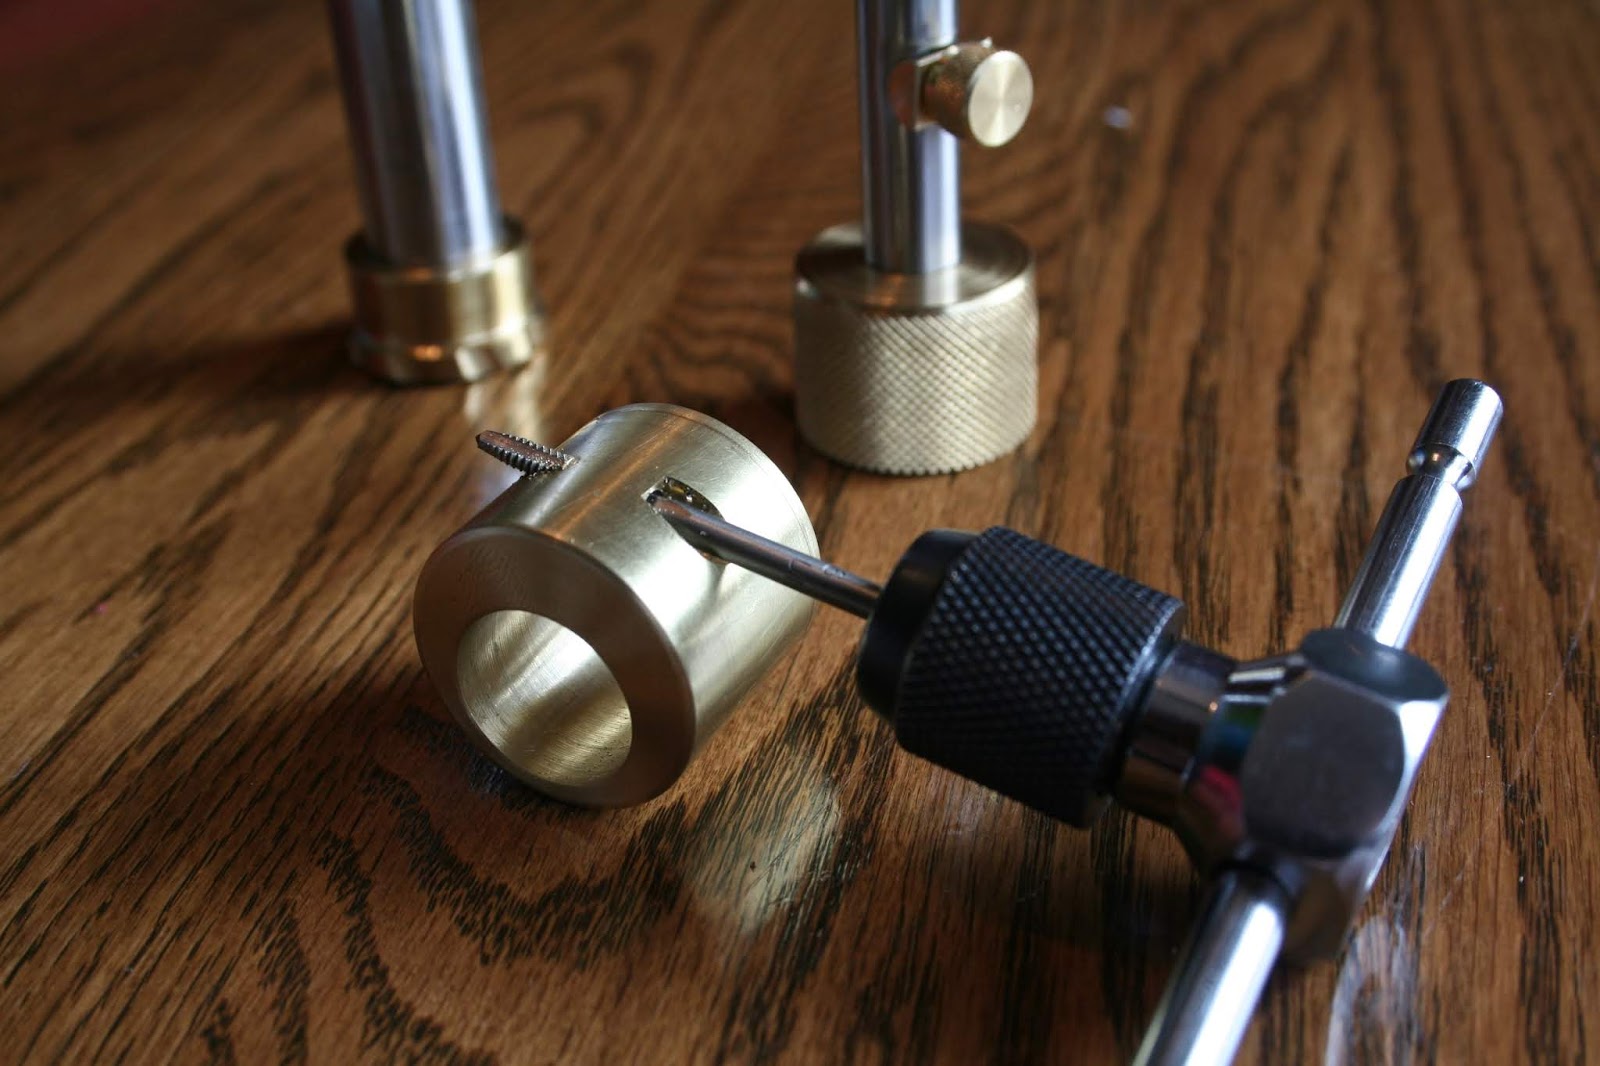
The next task was the bar clamp. This would slip over the bar shown above, and allow me to lock it down, or release it and pivot that full bar to get a different angle on the fly. I wanted to use that same 1 1/4 " brass bar I made the nuts from previously for the sake of simplicity. This meant I'd have to drill and bore a 3/4" hole off center to have enough room for a lock bolt. Incidentally, if you were wanting to do this and you didn't have a mill, you could easily do a center drill, not off-center. Then just drill a hole into that bore from the side and tap it. A lock-down screw can easily be made (or had from a hardware store). Still, I wanted to prove I could do a precision off-center drill. With the 1.25" diameter, minus a 0.750" diameter, I was left with 0.500" to play with. I wanted about 1/8" (0.125") on one end for a better clamp. So I had to find the center line from both sides. Then measure on one of those center lines and place my offset with a center punch :

With the center punch, it was time to chuck it up in the four-jaw chuck. A trick I've picked up is to place a dead center tip against the center-punched divot, and the back end against the live center, like so:

Place an indicator against the end of the dead center as close to the part as you can, then index it in like you would anything else.

At that point, you should have that off-center-punched hole on the center axis of the lathe. Now you can fire up the lathe, and drill and bore it like you would any other part :


It turned out pretty perfect, actually. I surprised myself. It's still not quite complete. I needed to set up the screw points. Again, I expect this could be done on the lathe by placing the clamp with the bore perpendicular to the lathe axis and doing an off-center drill again, but it was just easier to set it up on the mill and mill out the pockets and drill them for the 6-32 screw clamp :

Then, just a light tap and we're good :
I kept breaking 6-32 screws when I tried to cut them, so I ended up with a long 6-32 store-bought screw, and I drilled a chuck of drill rod with a counter bore hole deep enough to cross drill it, and tapped it (and Loctite to prevent it from coming undone). I threw a piece of stainless steel rod through it (and I was tired, to I simply bent the ends to keep that chunk of rod in place). It makes a great lever and really clamps down on that bar well. The current top-end of this now looks like :

My next task was to create an adjustable pivot so that the jaws could be repositioned. I wanted a ball socket for this (I needed an excuse to try out my ball-turning attachment). This would transition from the ball pivot to the stand. Unfortunately, I didn't get pictures of the ball before I lost that camera card, so I can't show much. There are two sockets. One is on the nut around the ball, and the other is where the ball locks up to (the stand). The sockets for the ball were simply a cylinder and the inside face being at a 45 degree angle. This would allow it to clamp down in a ring on the ball at the stand side, as well as the vise side at the top, essentially locking it into place. To mount the ball screw to the vise, I used a small chunk of stainless steel, faced it, drilled and tapped for 1/4"-20 threads, and added some smaller holes that were tapped to bolt it to the brass nut already tapped (you can see the two offset holes in the last picture right on the bottom). This piece was then attached, the nut put around the ball screw, and then the ball screw Loc-tite'd into that mount, e.g. :

All assembled (without the base), it's starting to look pretty decent :


My plans for the base are to use a brass fish ordered off of eBay (don't ask my why, some odd vision got stuck in my head). I would suggest that you keep the base fairly simple and use square stock to attach it to a table, but if you are making one, make it the way you want to make it. Since I wanted to use a brass fish, I first needed to clean it and gut it, I mean, get it flat. To do this, I thought I'd cut it in half. So, ask yourself, how do you hold something very much not round still enough to cut it half way decent?
I built a box about the right size.


I dropped the fish in and filled it half-way with Plaster of Paris. It was during this time I marked where the cut should go onto the box in blue sharpie.

I finished filling the box with the rest of the Plaster of Paris. Note that as I've thought about this later, I don't think it is as critical, and probably would have better results if you didn't fill it all the way. You simply need enough to anchor the object (fish) to the box so that it won't move, you have a flat surface on the bottom of the box, and you can feed it through the bandsaw. In my case, it resulted in an off-center cut, so one half of the fish was much thinner than the other half. I'll still make it work.

I let it cure for a day or two, then I connected the two blue sharpie marks with a line, and used that to feed it through a bandsaw in a relatively straight line.


I then broke the Plaster of Paris off to see how it turned out. My heart sank when it was't absolutely perfect, but then I remembered it is exactly where I had that line of separation.


I wanted to make a brass base to bolt it down to, but found a cheap piece of stainless steel 304 plate (1/2" thick), so I opted for that. I basically drilled a hole, tapped it to 1/2-13, and then re-turned the other end of the stand off down and cut a 1/2-13 thread on it.


After seeing it as it's simple self, I opted to leave the fish off. I love the solid simplicity of this vise.
UPDATE : I finally took the chance to test it out - this vise is the most stable one I've used. I haven't put rubber feet underneath it yet, but that will help just a little bit more. One of my intentions was to adapt it to bolt securely to a table. The base is solid enough that it is not a problem. I'll leave it as it is.

It is nice to have it fully functional!
No comments:
Post a Comment