

Stupid projects! The tool chest project has now hit a phase where I need to make 33 little tiny drawers, and my OCD is screaming at me about how to clamp them. If you may recall (maybe you've never seen that tool chest part A post), I had some of those 90-degree clamps, and they were fantastic.

They came in a package like this :

However, they were just a little bit too large (even the smaller 4.7" ones are too large). Try as I did, I could not find them in the 3" (or even 4") sizes - without regard to color (I'd love green ones, but alas, I'd take any). This one forced me to start thinking about making my own. I ordered a flat bar of 3"x3/4"x12", and mapped them out - I could get six of them out of this one piece, but it would take some fancy cutting. So, that forced me to the band saw.
Now, my band saw cuts horribly angled (it's about a 15 degree angle), so I had to do this on the vertical side where I could control it. That forced me to make a new table for the band saw :

Transfer screws for the win, to make sure all the holes lined up. Okay, on to cutting....
About 3/8" into the bar, my absolute laziness kicked in. There was no way I was going to cut for hours on end for each one of these. I had to make my band saw cut straight so I could let it do the work for me, and I could walk away.
It was at this time I realized the bearings have this hex plate behind them. I'd always thought that the bolt on the front was how you adjusted those, and boy was I wrong. I used the table to cut out a cheap, fast "wrench" for these (had to be less than 1/8" thick), and finally got those bearings adjusted. What do you know... it cuts straight!

Now I can start a cut and walk away! It's about an hour for each cut, so that hour spent tuning the band saw is well-justified. I got through two and a quarter cuts (I have 8 of them), and the bandsaw blade snapped.
I ordered a 12 TPI blade on Amazon, because it said it would work for tubing (I think I want an 18-24 TPI blade, really for thin walled tubing after looking at how far apart the teeth are), and slapped it on there. That thing made the cut in 5 minutes flat. I absolutely can't walk away with the speed that thing chews through aluminum. Anyway, I finished those cuts, went to the

I headed out to the scroll saw, ans snapped two blades before I'd even gotten 1/8" through those horizontal cuts. I switched to the milling machine - when you get tired of trying to conserve aluminum scrap size for later use (I was planning on using the middle blocks, cut in half, to make some of the other ends of these clamping tools), you just give up.


With one end cut to separate the squares, I went back to the bandsaw for the final cut to separate the squares from the middle chunks.

I now have six rough squares. I took one of my parallel bars for clamping, and simply used it as a straight edge. I used a known, good square that was clamped to it and trammed it in, then locked it down. The next steps were fairly easy. It was simply a matter of putting a parallel in between that straight edge, and snuggling the good, straight side of the squares to that, then locking it down and milling the perpendicular side.


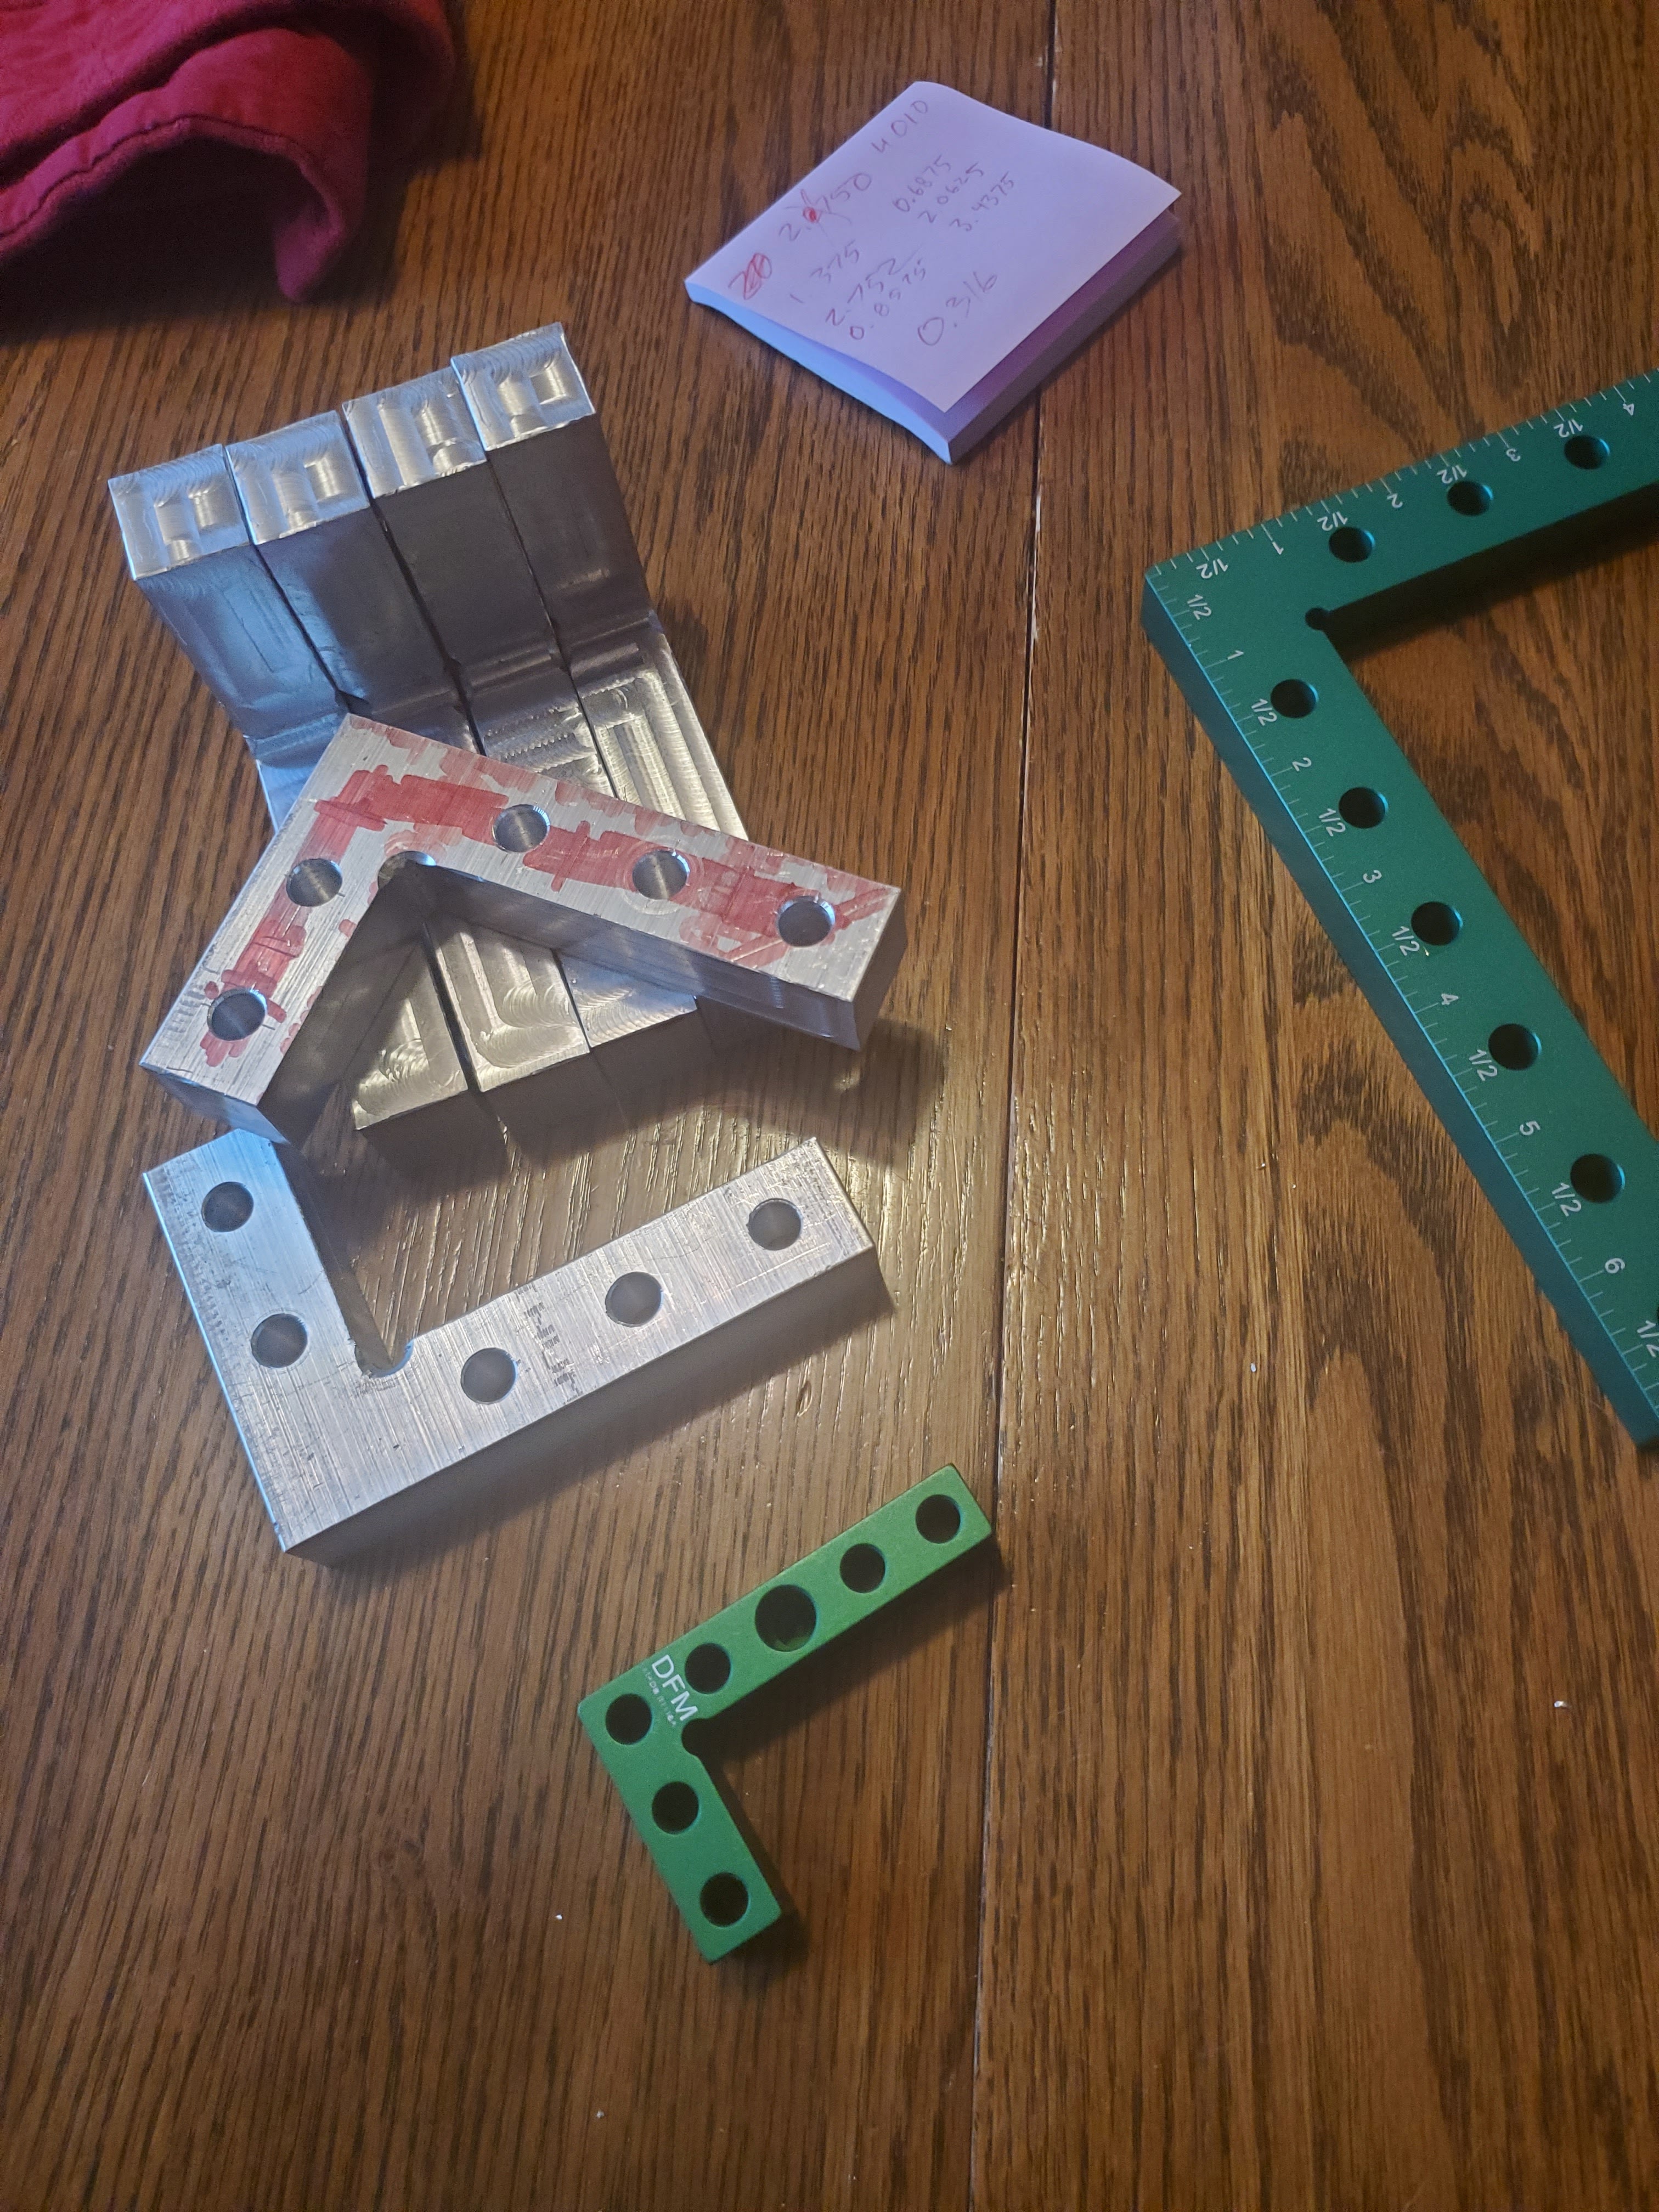
There we go. Six perfectly good squares, even if they aren't yet usable. So, each one now goes into the tool makers vise, and gets milled parallel (and to the same depth - I used a depth stop to make sure each arm was exactly the same width).

Now I have six squares that are parallel, perpendicular, deburred, and almost usable. I marked them out for drilling at 1" between holes, with a 1/2" starting point.


After drilling with a letter P (the holes on the original set are 0.316", and I wanted nearly interchangeable clamps, and worried about eventual anodizing decreasing the hole size, so I went with a letter-P-sized bit) and a quick deburr (I couldn't find my countersink bit), I have perfectly usable squares that are the right size for drawers. Incidentally, I found some smaller blocks on Amazon - I don't know if they are square, but I had to buy them. These new ones are tiny, while my custom-made ones are a medium size.
Granted, mine still have mill marks on the inside. Since I'm using the outside, I'm leaving that. When (or "if") I ever decide to anodize these things, I'll actually set them all up together and sand with a fine grit to polish them up first, and that should remove mill marks.
I needed the clamping blocks next. I ordered a 3/4"x1" aluminum bar, and sliced it into little blocks. I squared them up on the tiny mill, and drilled a single hole in each one, with a debur process. Yes, I did set them up as a castle wall once, just because I had a lot of little aluminum bricks.

Anyway, with those done, next was to slice a 1/4" stainless steel rod into 5" lengths, round over each end, and then thread one size for 3". These will be the bars. I knew I had to bend these, too, so while I was at the lathe doing the threading, I also cut two work setup jigs that could insert into some pipes I had laying around.
These work setup jigs are basically a closed-end tube with a set depth specifically to make it easier to get consistent results. Each was drilled one 3 1/2" deep and one 1/4" deep with a letter "F" (just a hair over 1/4" diameter for a slip fit), and turned down on the outside to fit inside the pipe. These were done out of aluminum in order to preserve thread.


I took the pipes outside on a cold Saturday morning, and heated up the section of each threaded rod until it was nice and hot, and bent them up to square. Honestly, I should have threaded the whole things on the lathe - those dies messed up on some of the threads.

They are now functional so I can get back to my tool chest build!
No comments:
Post a Comment