

Yet another project that has been on my back burner ever since I got the laser engraver/cutter was cutting a resin pen blank to make a custom, single instance pen blank for a buddy that loves working in his shop. It turns out he is a pretty crazy University of Utah nut, so I thought I'd use that logo as a test candidate. It's not even a precursor to the real project, this is more of a feasibility test.
So, I grabbed the SVG logo from Wikipedia, and then imported it into LightBurn. This is a "round" thing (it's going to be turned on a lathe), so I had to use a rotary attachment. Here's the deal - I attempted to use a rotary attachment that used wheels that were WAY to large on engraving mugs - and it was a failure on the outcome. Seeing as how these pen blanks would not have a handle, I decided to try a different rotary attachment.
Granted, with my recent foray into rotary's and CNC, I was a little skeptical. I had to measure the roller diameter, and then used the step options to control the rotary from the engraver to determine how many steps to get a full 360-degree rotation. It is a 12mm roller diameter, and it was 40mm on the engraver to get the full rotation.
With those numbers, I could plug them in to LightBurn, and then I could start to play with this new device.

Once I had LightBurn configured, it ran pretty decently, actually. I slapped a piece of masking tape around one end of the round resin blank with a sharpie mark. This allowed me to run a "frame" or an outline of the cut parameters in order to ensure it did not wrap more than once around the blank. Once I knew it would fit, I could size the cut decently, and then start to play with cuts in resin. For this, I went back to the non-rotary set up with scrap pen blank cut offs and started to play with settings. I started out with a 100% power and a 20mm/s speed (default in LightBurn is 100mm/s at 20% power), and kept decreasing the speed and measuring depth with a feeler gauge.


With a 10w laser, resin seemed to cut at 0.060" depth using a 1mm/s speed at 100% power. I calculated how many cuts it would take to get 3/16" into a 3/4" round resin blank (1/4 of the way in, I did NOT want to cut past center, but needed to get close, and I could always run a second pass) as 6 cuts.


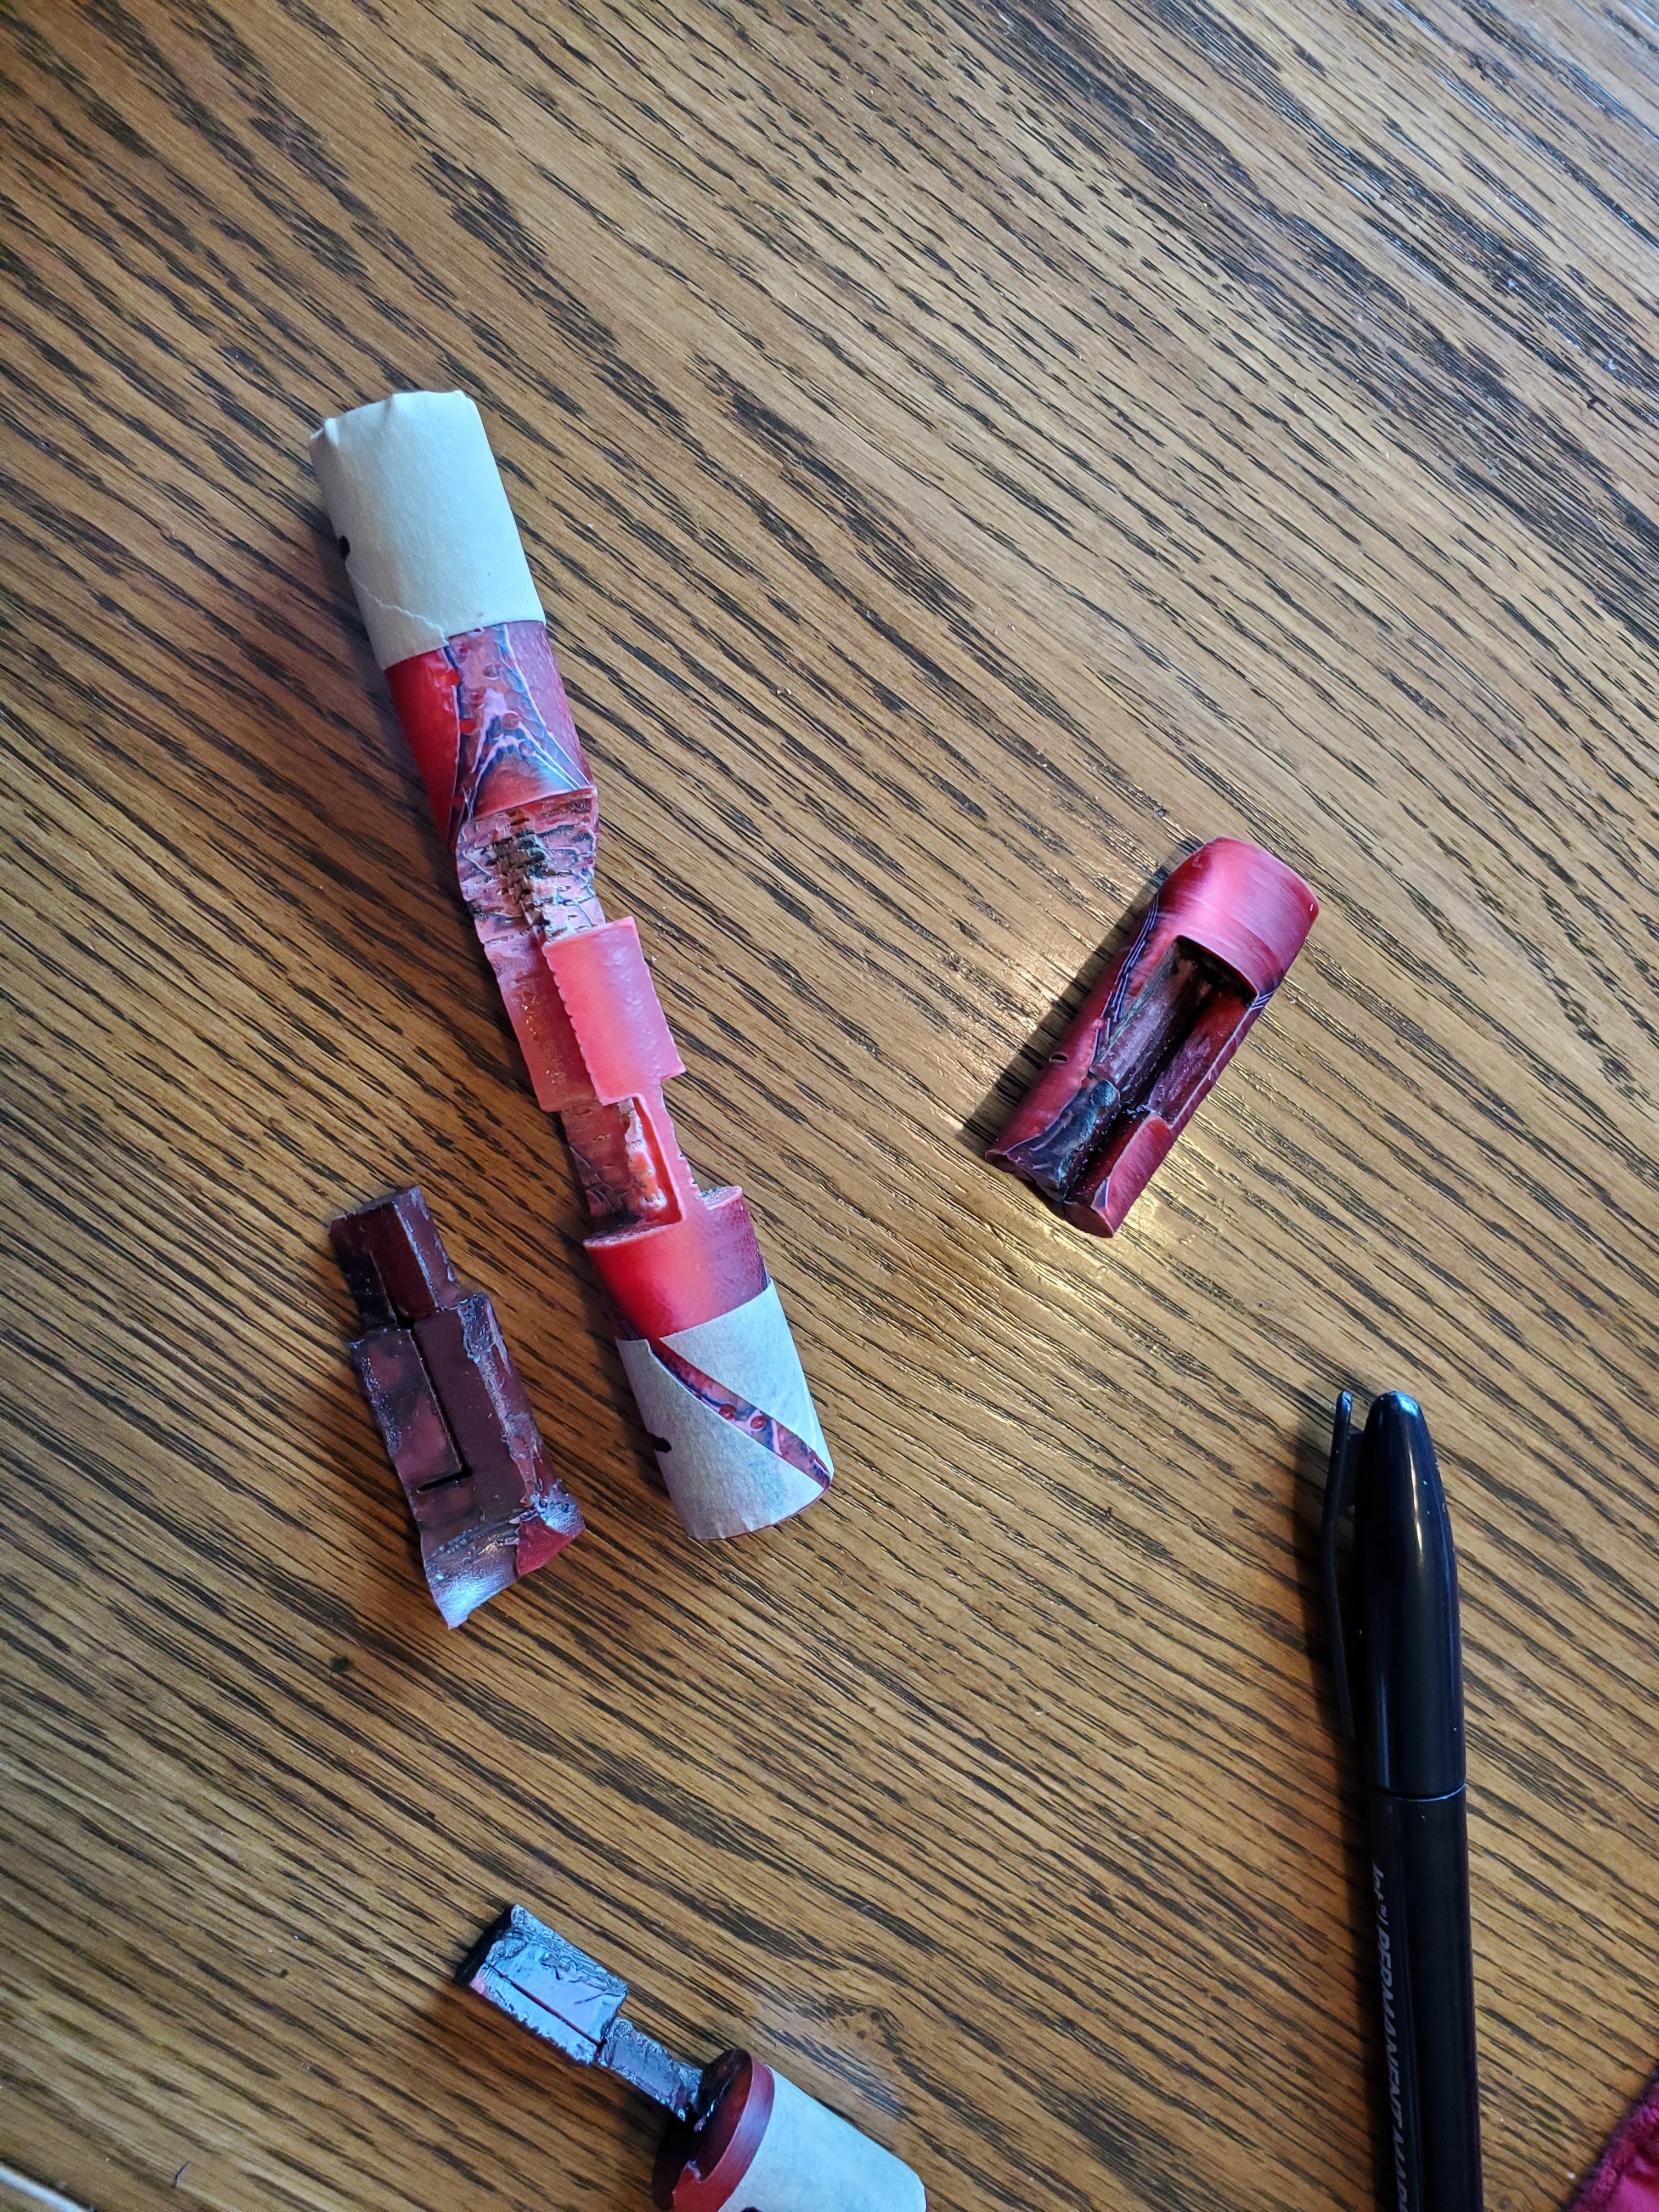
I grabbed one of my blanks (I turned 2 round, just in case I hosed it up - queue your ominous music), and set it up to cut. I ran two passes and thought I needed to check it before doing the final four.


I had lines on the wrong side of the blank. I made an assumption that it simply got out of sync, e.g. the blank got stuck or skipped in a turn. I started cussing about having to make 6 passes if it got out of sync this badly with only 2, and started to re-think the process. As I added "fill" cuts, (I wanted a hatch pattern I could use to break pieces out) to this new process, and to get cross lines instead of burning it all out, I opened the cut/layer settings (double click the cut) and alter the lines-per-inch or the line interval. Apply those settings, and click on the display/monitor icon to see it increase (or decrease) the line spacing and make sure it looks good.

It was at this point, my brain went geometrical, and I clued in. I grabbed the failure and held it up to the light, and.... yes, indeed... those added lines were simply coming TOO far through the blank - it was getting cut on the opposite side.

It turns out that, the farther away from the focal point you get, the wider the cut, and nearby cuts also get closer together. I had to tone my settings WAY down. I set it to cut at 100% power with a speed of 0.5mm/s, and this time I'd be also adding the cross cuts in the material I wanted to remove. I queued up my second pen blank, and let her rip. I only cut once.


This looks much more promising as a result. I grabbed some tweezers and started breaking the pieces out.


I used a Dremel to remove some gloss and melting (the epoxy had a hardened finish I think will interfere when I add new epoxy into the cavity.
It was at this time I realized I could take my "failure" blank, and break everything away from the failed cavity - essentially xor'ing the blank. Instead of red with a silver "U", this would become silver with a red "U". I could live with that. So, I cleaned that one up, too.


I think I have two viable blanks in front of me - I just need to obtain some epoxy resin (the long-curing stuff that has the potential to get into every single nook and cranny of this cut-up blank). I won't be turning these - I'll turn [sorry for the pun] them over to my buddy who can just give me feed back and tell me if they fly apart when turning, or just come up with a terrible finish. But, it's an option!
No comments:
Post a Comment