Friday, January 27, 2023

Using Laser Engraver, Plywood, and Poor Quality Control

I've had some rOtring drafting implements (pencil and pen) that I wanted to protect a little more than having them bounce around in a drawer all the time.  It dawned on me that I have the resources I need for a custom kit box.  I opened lightburn, and sketched out my pencils/pens and some old (albeit rusty) compasses that I'm going to clean up.

The next step was to load this into the laser cutter and make a run at cutting this out.  I used 1/4" plywood from some random store that had orange markings (Dome Hepot, I think is the name).  I set it up, and cut three out (and two solid with just the outline).  I started with a single pass at 20mm/s and 100% power, and counted the passes required to get through the material.

 It took 15 passes at 20mm/s and 100% power to "get through" the plywood.  So, I loaded the lightburn up again, and changed the cut to repeat 15 times, and started it off again.


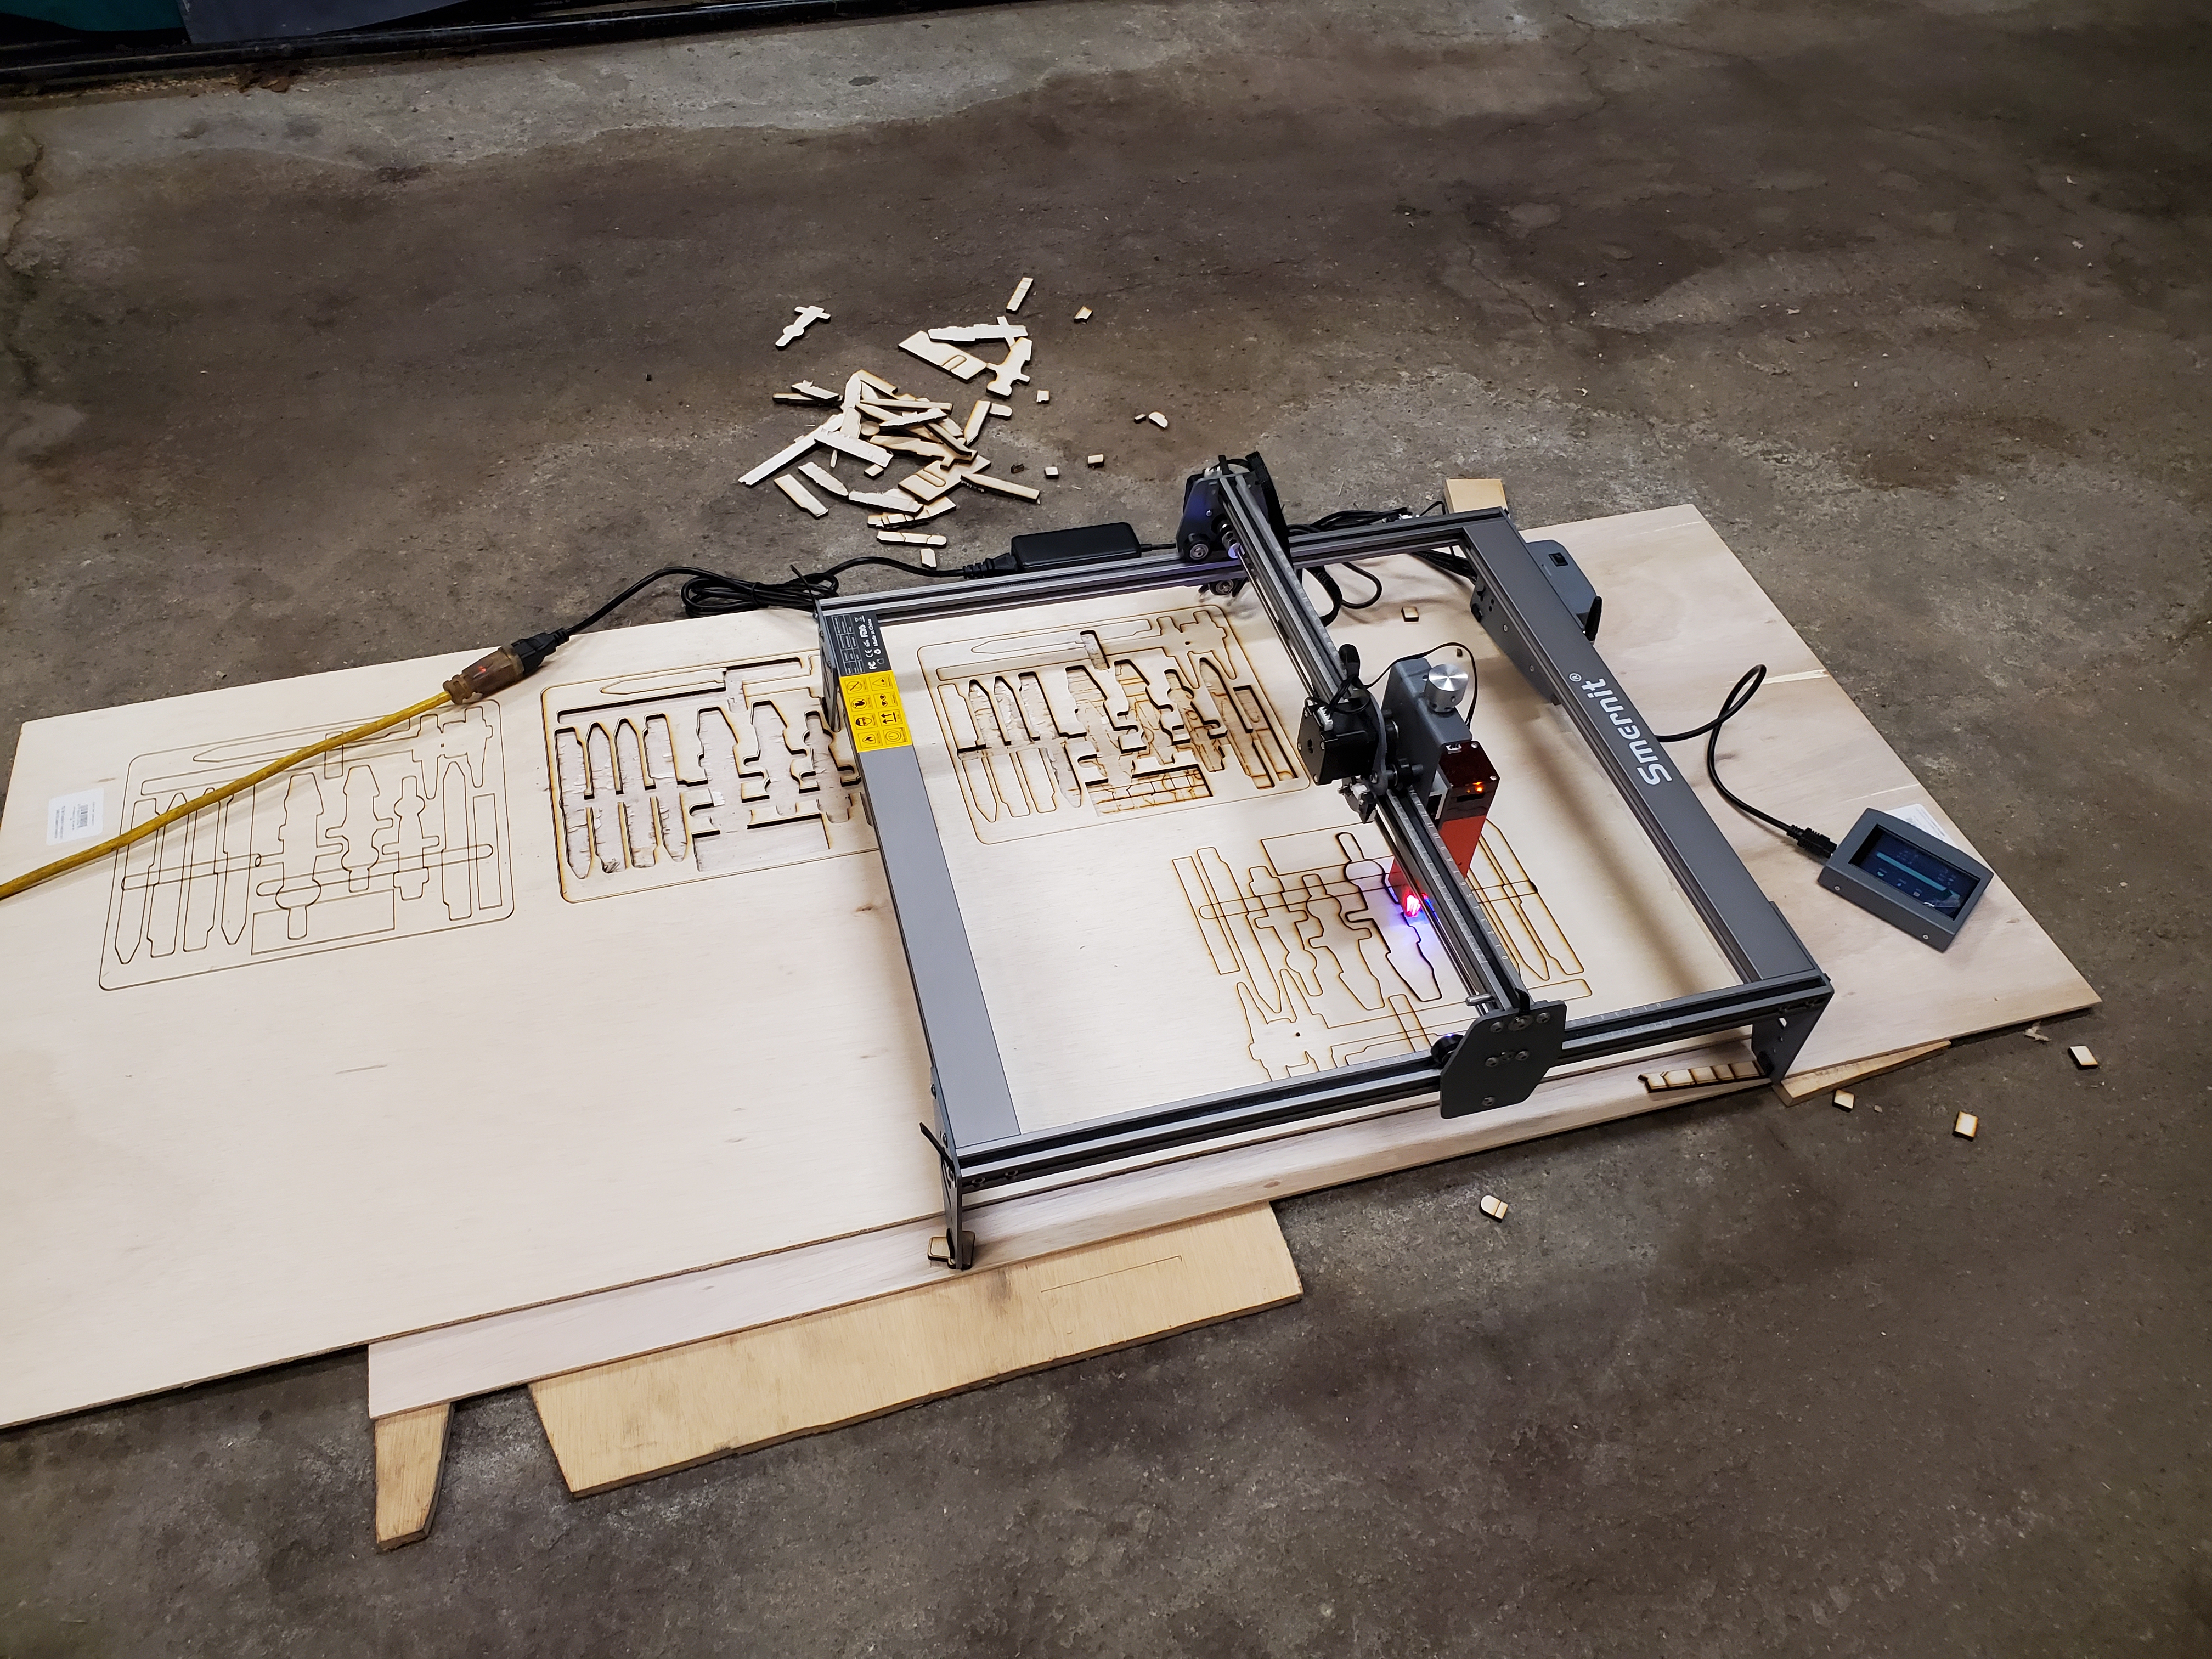
When I pulled everything off and flipped the board, I found that it did not cut all the way through in some places.  Further check confirmed that the 1/4" plywood was shallow in some areas 1/32", and it was thick in some areas by 1/32".  In other words, this material was up to 1/16" out of parallel.

[sigh].

Oh, the lack of quality control, all to make a buck.  Next time, I'll just order some real wood from Amazon in 1/4".  I think I'll have better luck.

...anyway...

After the irritation subsided enough for me to break out the hobby knife, I finished the final 1/16" cuts, and pulled the parts together.  I glued two templates and the bottom together, and one template and the other panel together, and then loaded the "boards" under a portable tool set for the weight, and gave it a few hours to get up.

Once out, I just HAD to check it.

This will work.  I used a 1/8" router round over bit to round the edges, did a quick sanding job, and threw stain (dark walnut) on the two halves of the clam shell, and gave it a coat of lacquer.  I also took some dark blue felt for a machinists' tool chest and fed that through the laser engraver, too (two pieces - well, three in case I messed one up).


With them looking pretty much perfect, it was time to glue them into place. I used 1/4"-20 hex nuts as spacers to allow weight to keep the felt down (my old Digital Fundamentals college text book, and my old welding text book as well, were about perfect sizes).  I only did one piece per clam shell half in order to keep myself from getting too stressed, and added the weight/book, and waited before doing the other piece.


I tossed in the merchandise just to see how it looked :

It will do nicely.  I ordered some oiled bronze hinges and a small latch (for a jewelry box).  I cut some space in using an X-acto knife for hinges, and then put it together.


 I guess I have to clean those compasses next.  I'm not sure the best way to proceed, maybe I'll take a stab at a rotary tumbler used for rock polishing, or maybe I'll actually put in the work to polish them using the wheels on the grinder.

Saturday, January 7, 2023

Laser Engravers, Resin, and Pen Turning Kits

Yet another project that has been on my back burner ever since I got the laser engraver/cutter was cutting a resin pen blank to make a custom, single instance pen blank for a buddy that loves working in his shop.  It turns out he is a pretty crazy University of Utah nut, so I thought I'd use that logo as a test candidate.  It's not even a precursor to the real project, this is more of a feasibility test.

So, I grabbed the SVG logo from Wikipedia, and then imported it into LightBurn.  This is a "round" thing (it's going to be turned on a lathe), so I had to use a rotary attachment.  Here's the deal - I attempted to use a rotary attachment that used wheels that were WAY to large on engraving mugs - and it was a failure on the outcome.  Seeing as how these pen blanks would not have a handle, I decided to try a different rotary attachment.

Granted, with my recent foray into rotary's and CNC, I was a little skeptical.  I had to measure the roller diameter, and then used the step options to control the rotary from the engraver to determine how many steps to get a full 360-degree rotation.  It is a 12mm roller diameter, and it was 40mm on the engraver to get the full rotation.

With those numbers, I could plug them in to LightBurn, and then I could start to play with this new device.

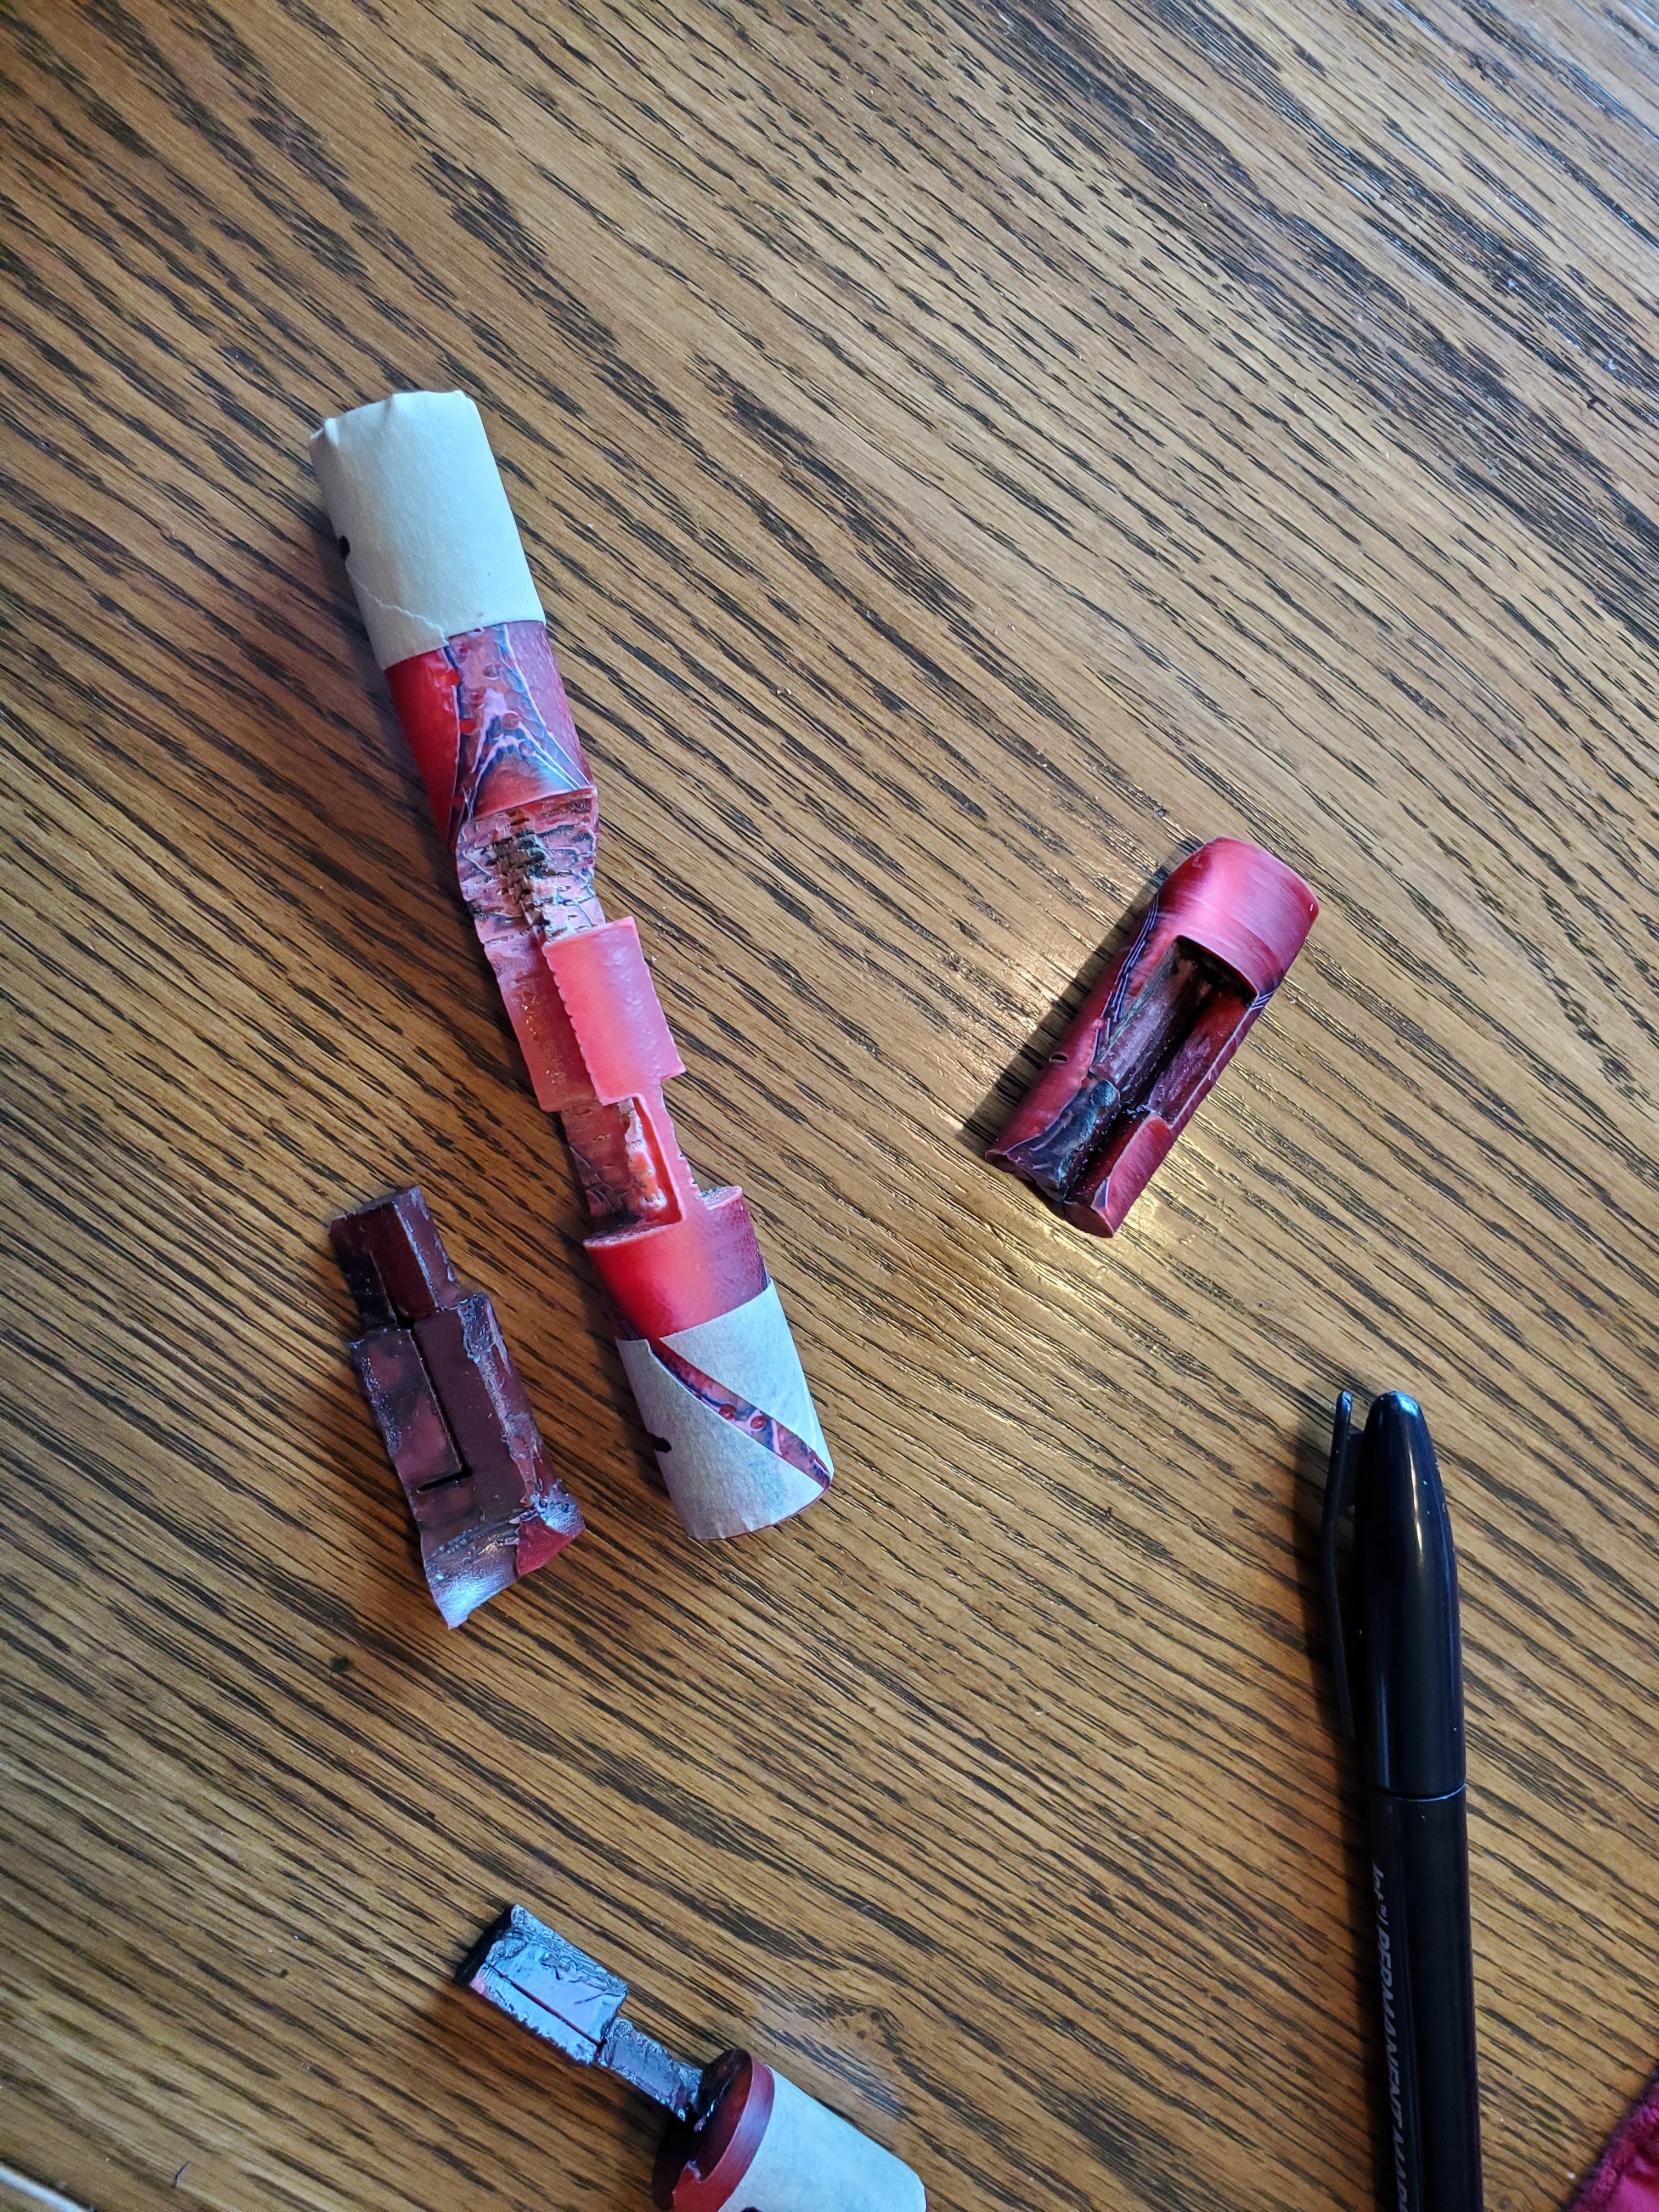
Once I had LightBurn configured, it ran pretty decently, actually.  I slapped a piece of masking tape around one end of the round resin blank with a sharpie mark.  This allowed me to run a "frame" or an outline of the cut parameters in order to ensure it did not wrap more than once around the blank.  Once I knew it would fit, I could size the cut decently, and then start to play with cuts in resin.  For this, I went back to the non-rotary set up with scrap pen blank cut offs and started to play with settings.  I started out with a 100% power and a 20mm/s speed (default in LightBurn is 100mm/s at 20% power), and kept decreasing the speed and measuring depth with a feeler gauge.


With a 10w laser, resin seemed to cut at 0.060" depth using a 1mm/s speed at 100% power.  I calculated how many cuts it would take to get 3/16" into a 3/4" round resin blank (1/4 of the way in, I did NOT want to cut past center, but needed to get close, and I could always run a second pass) as 6 cuts.


I grabbed one of my blanks (I turned 2 round, just in case I hosed it up - queue your ominous music), and set it up to cut. I ran two passes and thought I needed to check it before doing the final four.


I had lines on the wrong side of the blank.  I made an assumption that it simply got out of sync, e.g. the blank got stuck or skipped in a turn.  I started cussing about having to make 6 passes if it got out of sync this badly with only 2, and started to re-think the process.  As I added "fill" cuts, (I wanted a hatch pattern I could use to break pieces out) to this new process, and to get cross lines instead of burning it all out, I opened the cut/layer settings (double click the cut) and alter the lines-per-inch or the line interval.  Apply those settings, and click on the display/monitor icon to see it increase (or decrease) the line spacing and make sure it looks good.

It was at this point, my brain went geometrical, and I clued in.  I grabbed the failure and held it up to the light, and.... yes, indeed... those added lines were simply coming TOO far through the blank - it was getting cut on the opposite side.

It turns out that, the farther away from the focal point you get, the wider the cut, and nearby cuts also get closer together.  I had to tone my settings WAY down.  I set it to cut at 100% power with a speed of 0.5mm/s, and this time I'd be also adding the cross cuts in the material I wanted to remove. I queued up my second pen blank, and let her rip.  I only cut once.


This looks much more promising as a result.  I grabbed some tweezers and started breaking the pieces out.


I used a Dremel to remove some gloss and melting (the epoxy had a hardened finish I think will interfere when I add new epoxy into the cavity.

It was at this time I realized I could take my "failure" blank, and break everything away from the failed cavity - essentially xor'ing the blank.  Instead of red with a silver "U", this would become silver with a red "U".  I could live with that.  So, I cleaned that one up, too.


I think I have two viable blanks in front of me - I just need to obtain some epoxy resin (the long-curing stuff that has the potential to get into every single nook and cranny of this cut-up blank).  I won't be turning these - I'll turn [sorry for the pun] them over to my buddy who can just give me feed back and tell me if they fly apart when turning, or just come up with a terrible finish.  But, it's an option!

Saturday, December 31, 2022

Square Woodworkers Clamps - and Band Saw Tuneup

Stupid projects!  The tool chest project has now hit a phase where I need to make 33 little tiny drawers, and my OCD is screaming at me about how to clamp them. If you may recall (maybe you've never seen that tool chest part A post), I had some of those 90-degree clamps, and they were fantastic.

They came in a package like this :

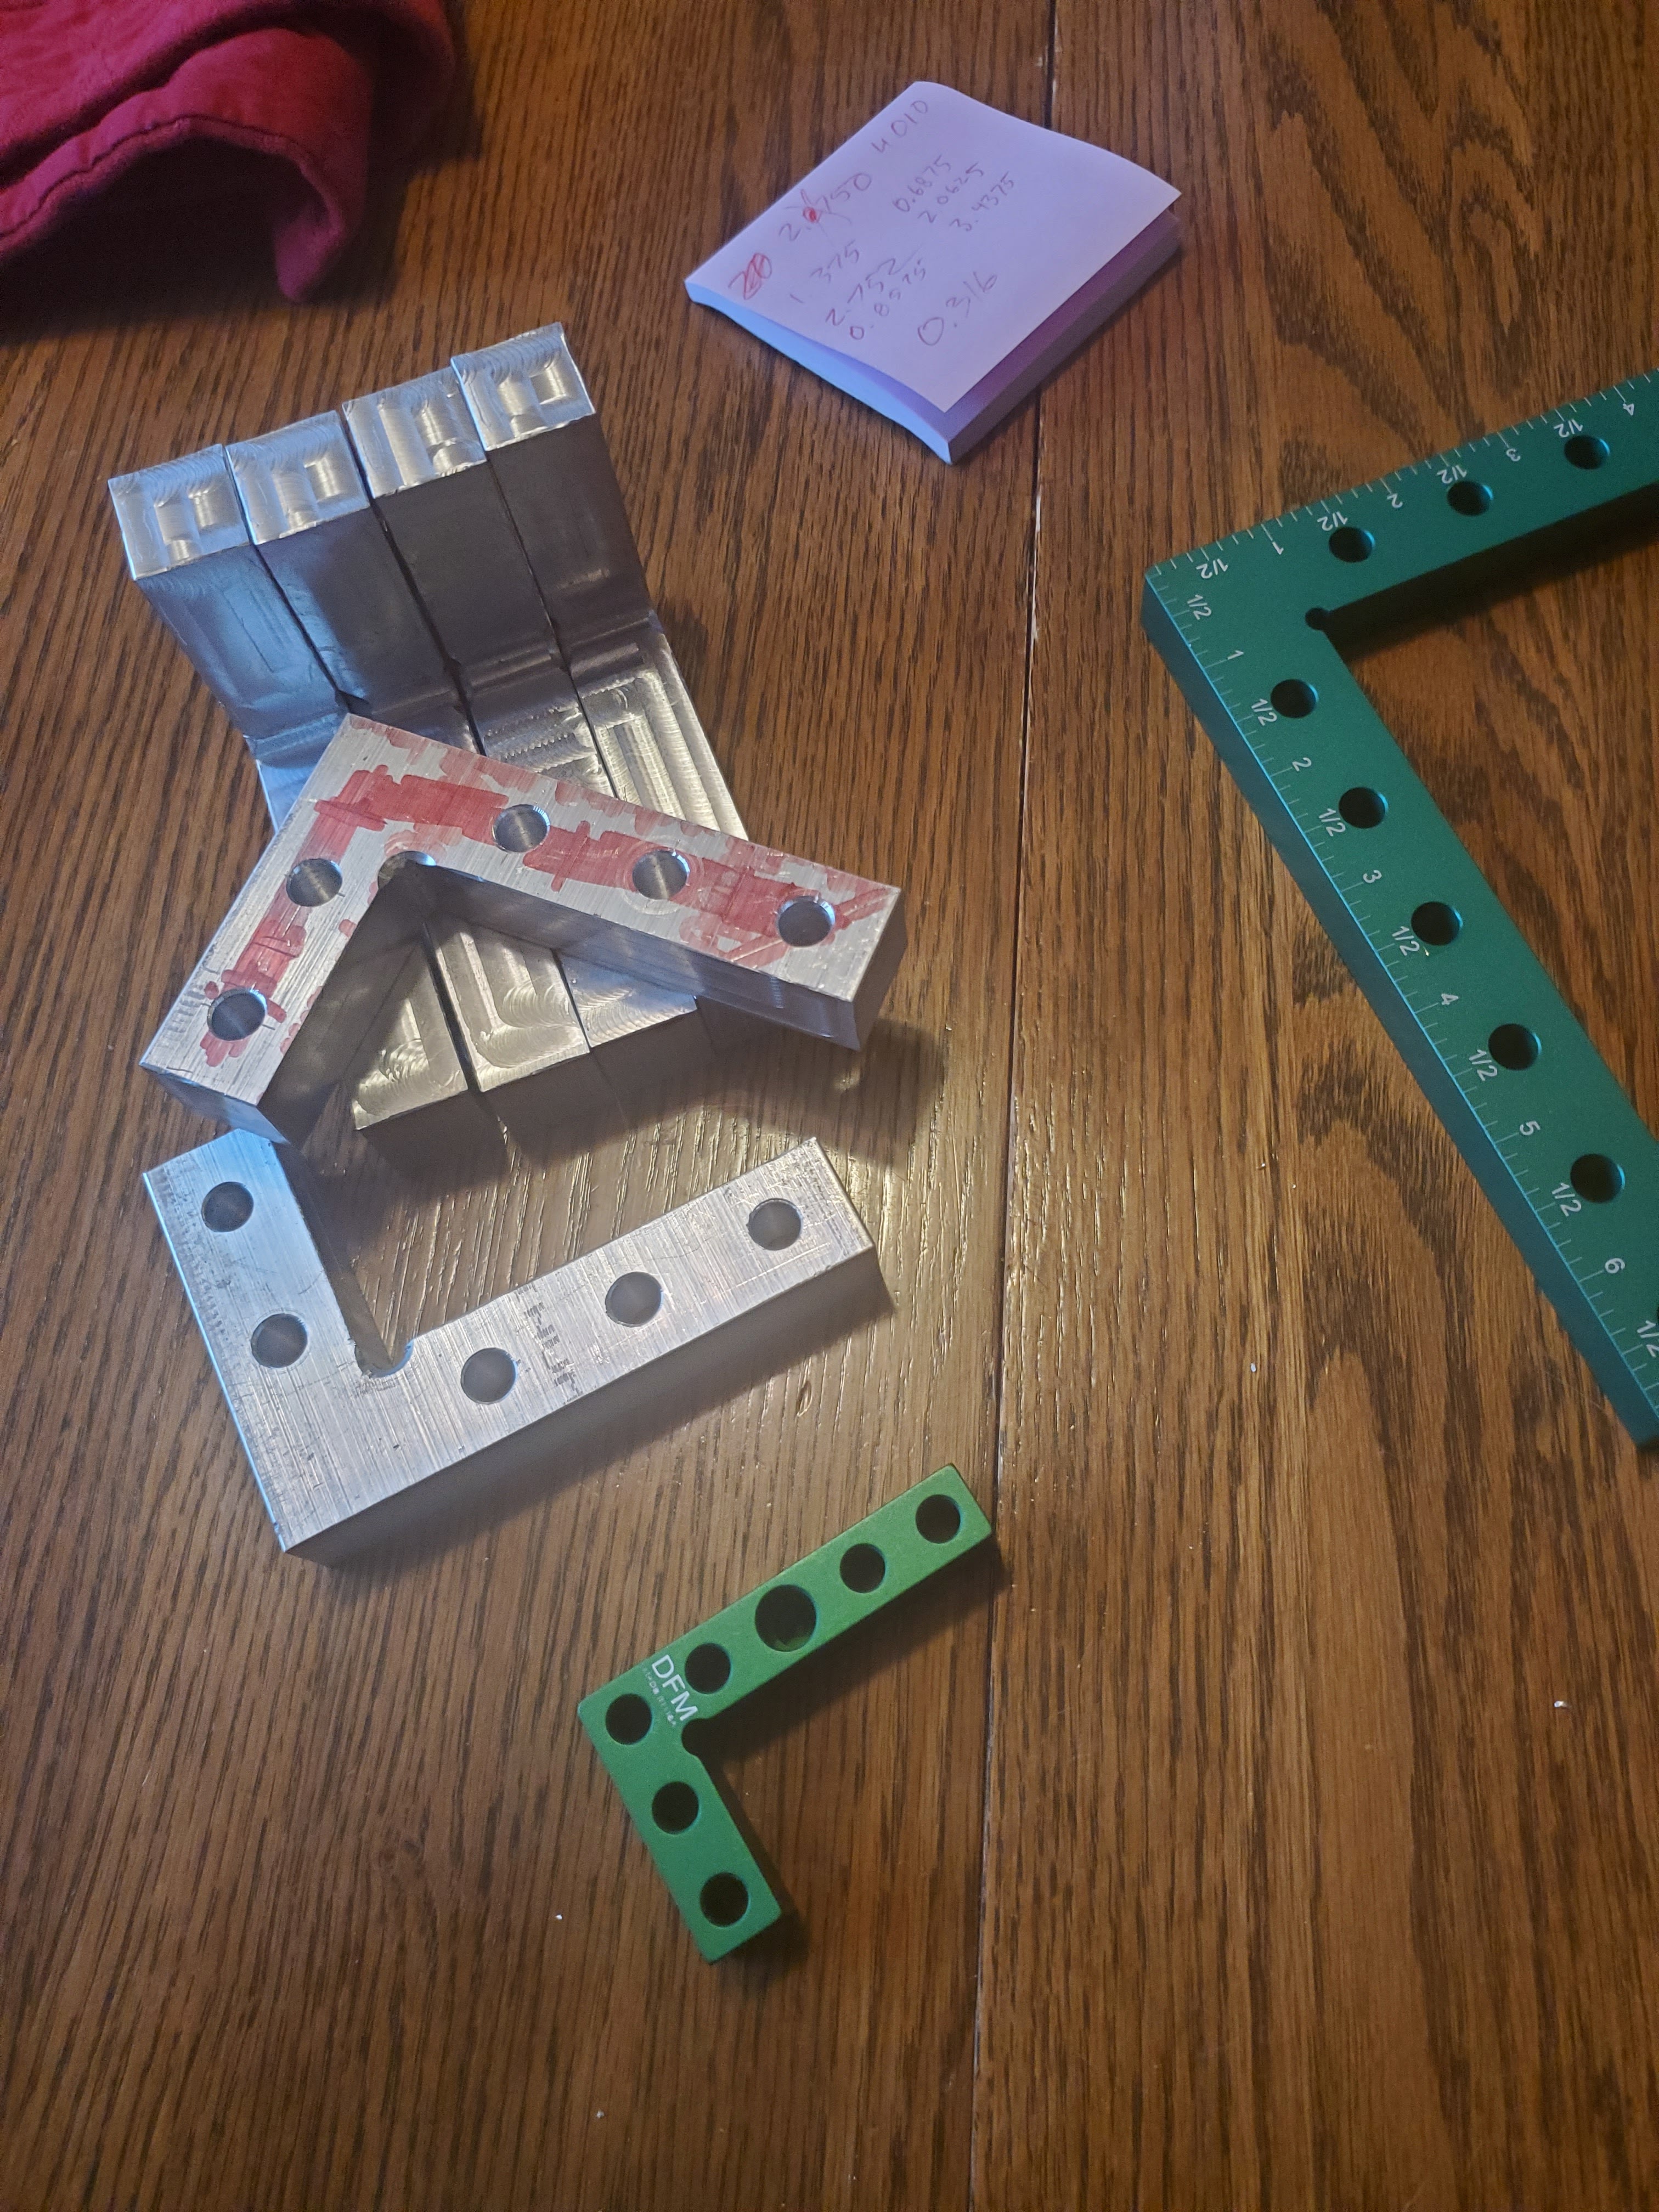
However, they were just a little bit too large (even the smaller 4.7" ones are too large).  Try as I did, I could not find them in the 3" (or even 4") sizes - without regard to color (I'd love green ones, but alas, I'd take any).  This one forced me to start thinking about making my own.  I ordered a flat bar of 3"x3/4"x12", and mapped them out - I could get six of them out of this one piece, but it would take some fancy cutting.  So, that forced me to the band saw.

Now, my band saw cuts horribly angled (it's about a 15 degree angle), so I had to do this on the vertical side where I could control it.  That forced me to make a new table for the band saw :

Transfer screws for the win, to make sure all the holes lined up.  Okay, on to cutting....

About 3/8" into the bar, my absolute laziness kicked in.  There was no way I was going to cut for hours on end for each one of these.  I had to make my band saw cut straight so I could let it do the work for me, and I could walk away.

It was at this time I realized the bearings have this hex plate behind them.  I'd always thought that the bolt on the front was how you adjusted those, and boy was I wrong.  I used the table to cut out a cheap, fast "wrench" for these (had to be less than 1/8" thick), and finally got those bearings adjusted.  What do you know... it cuts straight!

Now I can start a cut and walk away!  It's about an hour for each cut, so that hour spent tuning the band saw is well-justified.  I got through two and a quarter cuts (I have 8 of them), and the bandsaw blade snapped.

I ordered a 12 TPI blade on Amazon, because it said it would work for tubing (I think I want an 18-24 TPI blade, really for thin walled tubing after looking at how far apart the teeth are), and slapped it on there.  That thing made the cut in 5 minutes flat.  I absolutely can't walk away with the speed that thing chews through aluminum.  Anyway, I finished those cuts, went to the 


I headed out to the scroll saw, ans snapped two blades before I'd even gotten 1/8" through those horizontal cuts.  I switched to the milling machine - when you get tired of trying to conserve aluminum scrap size for later use (I was planning on using the middle blocks, cut in half, to make some of the other ends of these clamping tools), you just give up.


With one end cut to separate the squares, I went back to the bandsaw for the final cut to separate the squares from the middle chunks.

I now have six rough squares.  I took one of my parallel bars for clamping, and simply used it as a straight edge.  I used a known, good square that was clamped to it and trammed it in, then locked it down.  The next steps were fairly easy.  It was simply a matter of putting a parallel in between that straight edge, and snuggling the good, straight side of the squares to that, then locking it down and milling the perpendicular side.


There we go.  Six perfectly good squares, even if they aren't yet usable.  So, each one now goes into the tool makers vise, and gets milled parallel (and to the same depth - I used a depth stop to make sure each arm was exactly the same width).

Now I have six squares that are parallel, perpendicular, deburred, and almost usable.  I marked them out for drilling at 1" between holes, with a 1/2" starting point.


After drilling with a letter P (the holes on the original set are 0.316", and I wanted nearly interchangeable clamps, and worried about eventual anodizing decreasing the hole size, so I went with a letter-P-sized bit) and a quick deburr (I couldn't find my countersink bit), I have perfectly usable squares that are the right size for drawers.  Incidentally, I found some smaller blocks on Amazon - I don't know if they are square, but I had to buy them.  These new ones are tiny, while my custom-made ones are a medium size.

Granted, mine still have mill marks on the inside.  Since I'm using the outside, I'm leaving that.  When (or "if") I ever decide to anodize these things, I'll actually set them all up together and sand with a fine grit to polish them up first, and that should remove mill marks.

I needed the clamping blocks next.  I ordered a 3/4"x1" aluminum bar, and sliced it into little blocks.  I squared them up on the tiny mill, and drilled a single hole in each one, with a debur process. Yes, I did set them up as a castle wall once, just because I had a lot of little aluminum bricks.


Anyway, with those done, next was to slice a 1/4" stainless steel rod into 5" lengths, round over each end, and then thread one size for 3".  These will be the bars.  I knew I had to bend these, too, so while I was at the lathe doing the threading, I also cut two work setup jigs that could insert into some pipes I had laying around.

These work setup jigs are basically a closed-end tube with a set depth specifically to make it easier to get consistent results. Each was drilled one 3 1/2" deep and one 1/4" deep with a letter "F" (just a hair over 1/4" diameter for a slip fit), and turned down on the outside to fit inside the pipe.  These were done out of aluminum in order to preserve thread.


I took the pipes outside on a cold Saturday morning, and heated up the section of each threaded rod until it was nice and hot, and bent them up to square.  Honestly, I should have threaded the whole things on the lathe - those dies messed up on some of the threads.

They are now functional so I can get back to my tool chest build!

Friday, December 16, 2022

Turning The Butt End of a Handle

We have a Christmas present, with the presentation a week early.  So, please don't tell the anonymous person who this is for that it's done.  They know it's being made.  Anyway.... since I'm letting the cat out of the bag early, here we go.

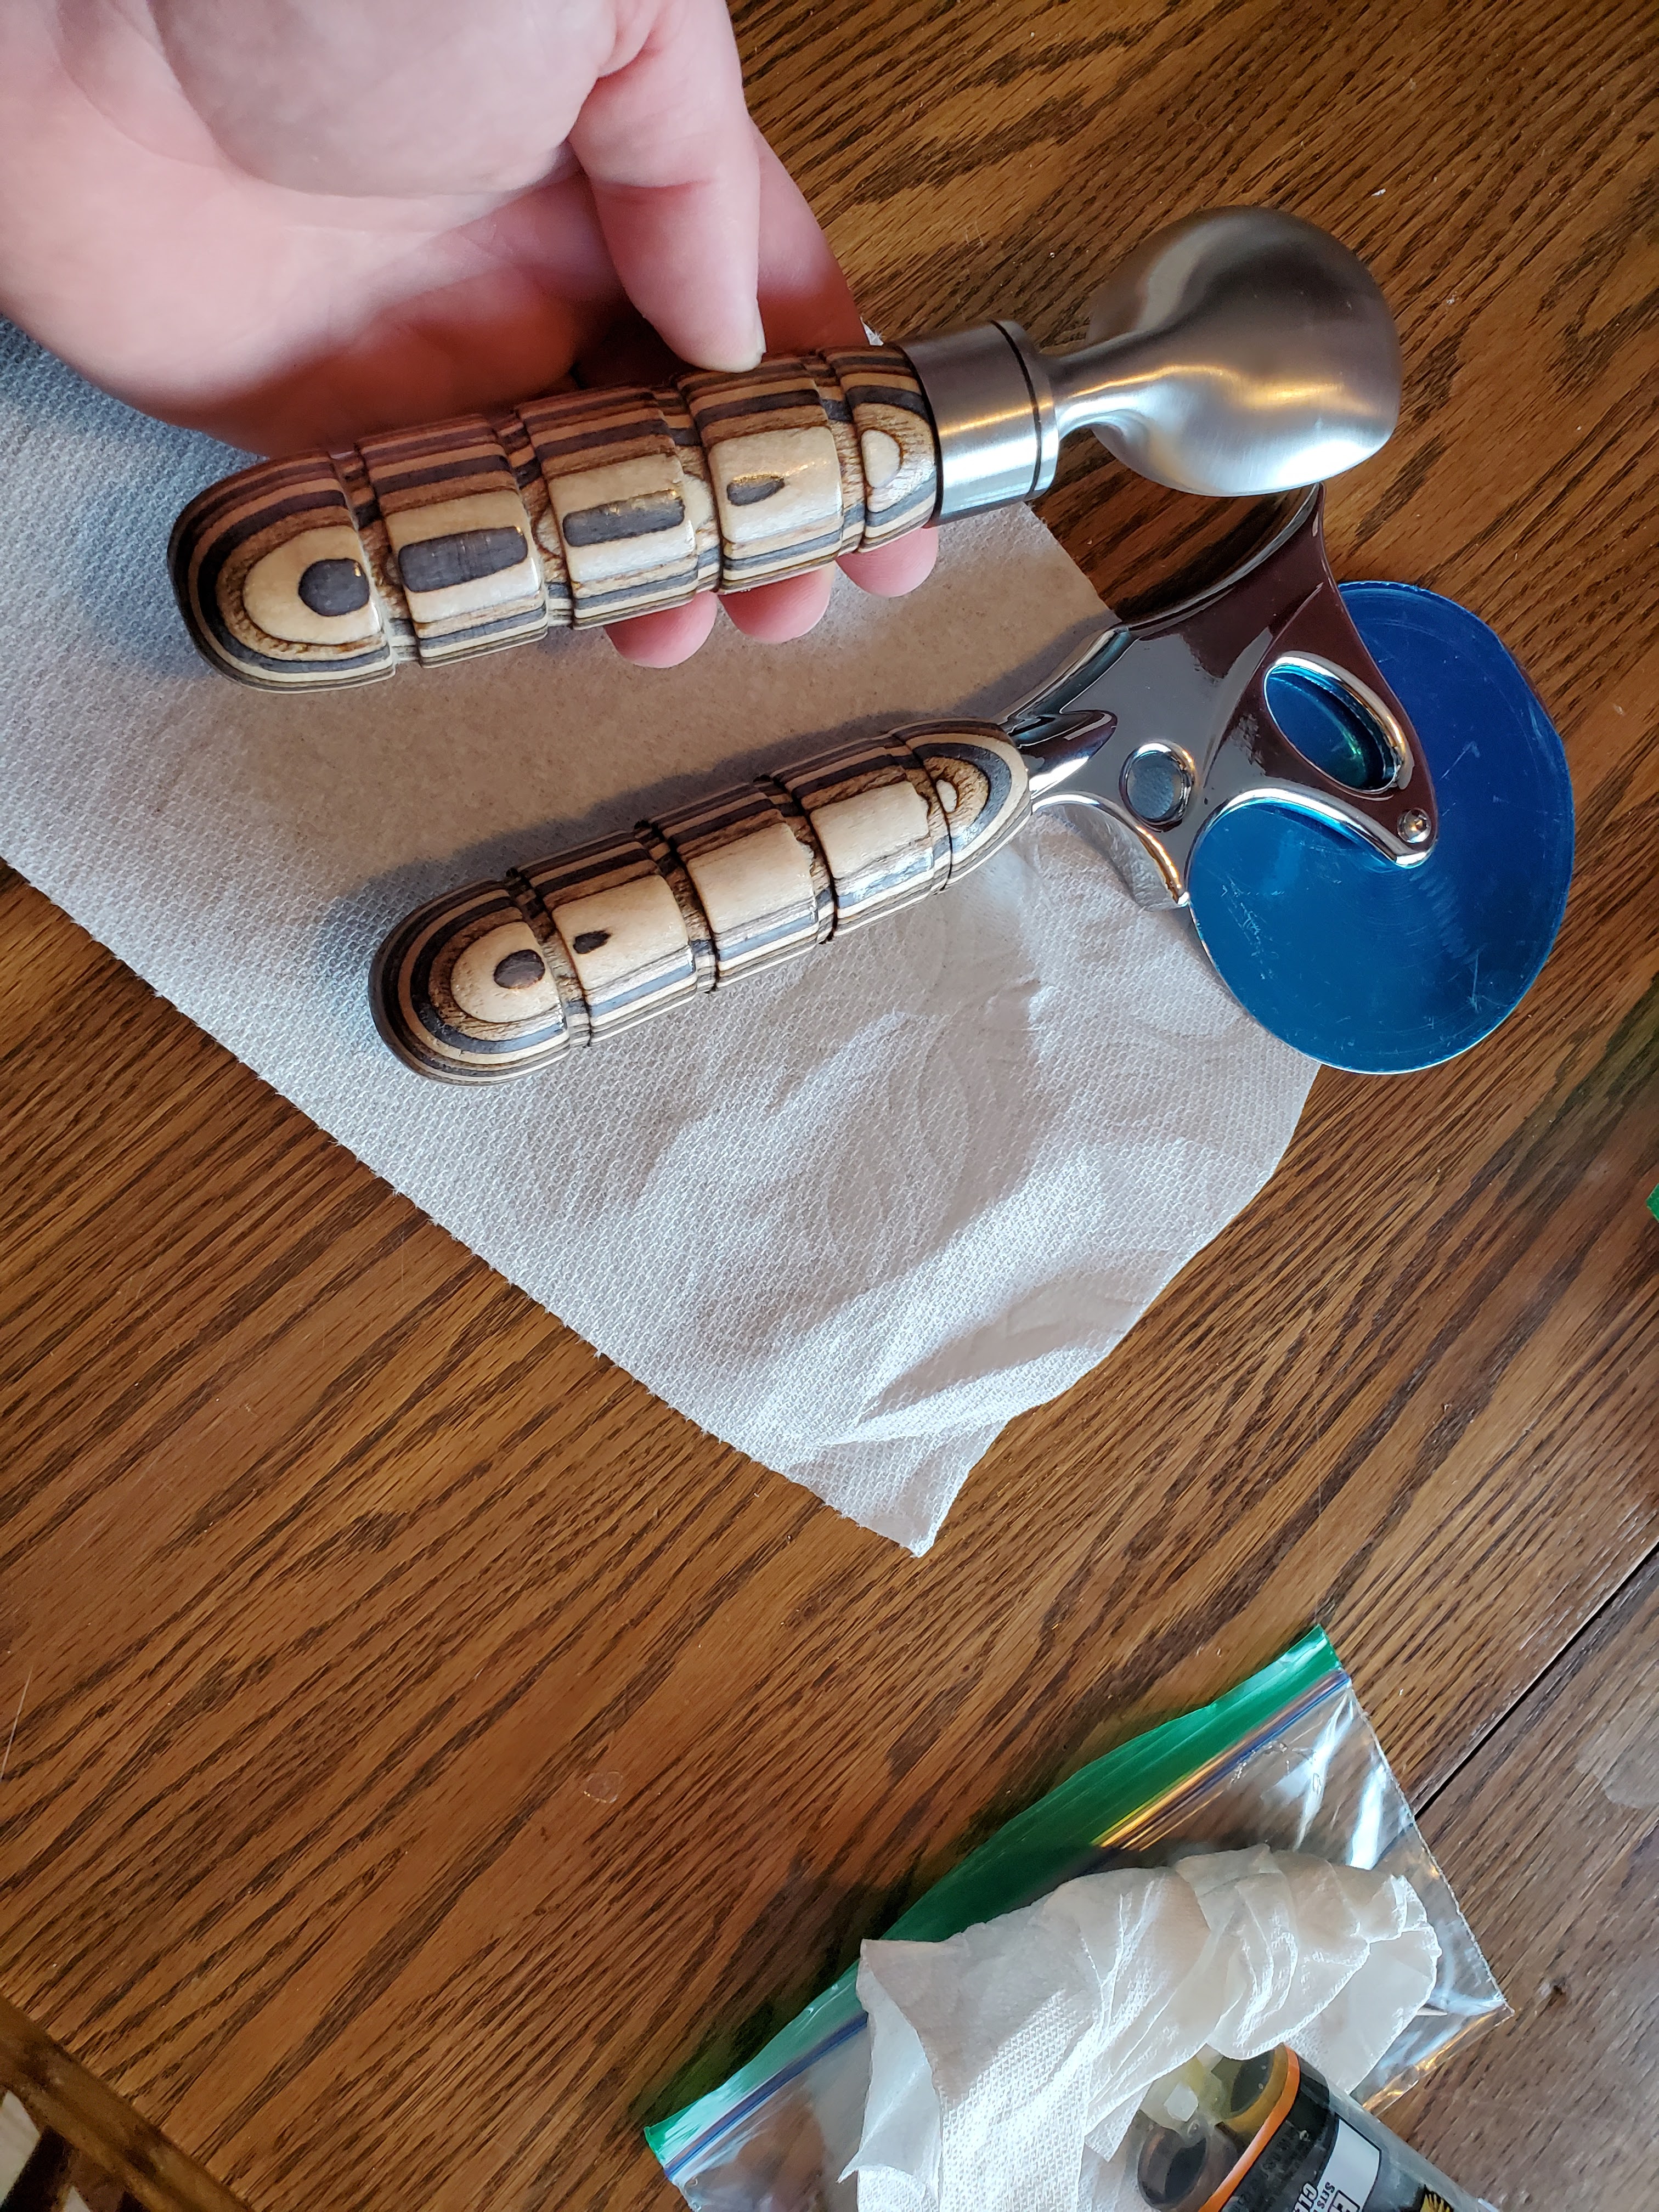
I was asked if I could create an ice cream scoop for a family member as a gift.  I was given a wide berth on this one.  Since this unnamed individual is a hunter/fisher, I chose a SpectraPly blank.  It's essentially a dyed and laminated block of plywood.  The full kit stuff is all available through Woodcraft (they even have other things like pizza cutters).  I turned the blank round, cut the surface (this is called facing in the metal lathe world) for whatever was on the front of it, drilled it for an insert (I had to get my own insert for the ice cream scoop, since I do not like threading wood), and glued it all up like any normal turning assignment.


So, if you check those pictures, you'll see that the butt ends of these two handles are still square.  I do want them turned better, and this is the challenge presented to me.  The handles are all about 1 1/4" inner diameter, which is a little larger than the handles.  PVC pipe is under pressure, and will compress more when those stresses are released, so I opted to use it for the solution.  I cut along the lines about 2" (for a spacer for the chuck jaws), and then cut each off.  If you cut the band off and then cut lengthwise on the PVC, be prepared for the pipe to grab the saw and do weird things with it (like a table saw throwing it at high velocity right at your face, arms, or chest).


This allowed me to put it in the only chuck I had with a large enough inside diameter for this handle, where I could turn the remainder down and put the grip grooves in.

A quick coat in lacquer and glued together, and it looks sharp!


 I hope they like them!